Wake On LAN
Introduction to WOL
- Wake on LAN (WOL), sometime called Remote Wake Up, is an Ethernet computer networking standard that allows you to turn-on a power-off computer or wake-up a sleeping or hibernating computer from another location over a network connection. WOL works by sending a special message or signal over a local area network (LAN) or a wide area network (WAN), such as the Internet, to trigger power-up of a computer on a private LAN.
Purpose of Using WOL
Some of the purposes of using WOL are:
- saves time.
- Saves electrical energy.
- Saves money on electricity bills.
- A PC is more secure from hackers when it is off.
- Allows users to turn on and shutdown PCs remotely, etc.
Bellow are some example of using WOL.
- You want to be able to access your home computer anywhere at anytime you want, but you don't want to through money away for your computer that has to be turned on all the time. You want to turn it on when you want to use it and shut it down when you are done.
- You may want to access your home PC from work or your work PC from home, you might want to turn it on and get access to your files remotely, and then shut it down when you're done.
- You want to access your files on your computer at home while you are traveling.
- A technician may want to perform schedule and maintenance tasks without physically visit each computer on the network.
Implementing WOL can help you to achieve some of the above goals.
Hardware Requirements
A PC which supports WOL is required to enable WOL technology. Hardware requirements for WOL includes:
- An ATX power supply that meets ATX 2.01 specifications.
- An ATX motherboard with an onboard 3-pin WOL connector, and a network card that can support WOL with its cable to the motherboard properly installed. Most motherboards today has a built in NIC and support Wake on LAN functionality.
- NOTE: Most PCs today have the above specifications built-in. You may check if your have a PC that supported WOL by checking in the Power Management option in BIOS.
My Example Lab
In this lab, I will walk you through the steps of enabling WOL, installing utility software, and testing it on a local area network (LAN). I used a PC and a laptop which both connected to a switch. The switch connected to a router that has connection to the internet. The PC I used in this lab is a custom built PC, and it has Windows XP Operating System installed. The installed motherboard is ASUS Rampage II Formula witch has quad ports NIC built-in, and the power supply is BFGR650PSU manufactured by BFG Tech.
The performed this lab as follow:
- Enable WOL on the PC.
- Install a WOL utility on the laptop.
- Use the utility to trigger power on of the PC.
- Test to see if the PC has power on or not using ping command.
- Connect to the PC using Remote Desktop Connection software.
Enabling WOL
In order for WOL to work, WOL feature must be enable in BIOS and Operating System. The process of enabling WOL may be different for each motherboard, so you may need to do some research on your motherboard.
- On the ASUS Rampage II Formula, there are two options that must be enable in BIOS and also two option in Windows XP. WOL feature is enabled on my PC by following the steps bellow.
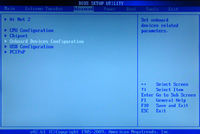
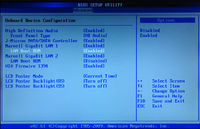
- Enable LAN Boot ROM. Power on the PC and press Delete key to enter the BIOS setup. Select Advanced>LAN Boot ROM>Enabled.
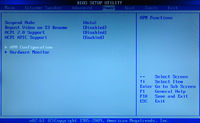
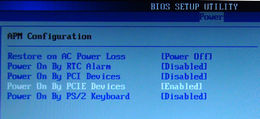
- Enable Power On By PCIE Devices. Select Power>APM Configuration>Power On By PCIE Devices>Enabled.
- Go to Exit and save changes to save the setting. Then it will boot into Windows Operating System normally.
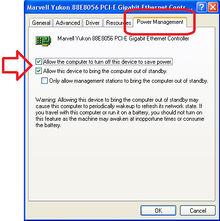
- WOL must be enabled on the Operation System you are running. Here I will show you how to enable WOL in Windows XP.
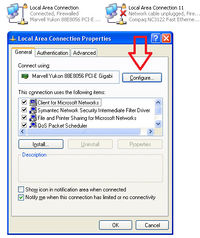
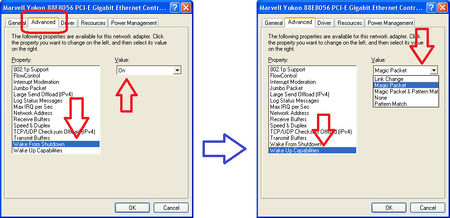
- Go to "Start>Control Panel>Network Connection". Right clicking on "Local Area Connection>Properties". Click on "Configure" button, and click on "Advanced" tab. Scroll down until you see Wake From Shutdown and Wake Up Capabilities.
- Select "Wake From Shutdown" and change the value from Off to On.
- Select Wake Up Capabilities and change the value to Magic Packet.
- Click OK button to save the changes.
Now the PC is ready for WOL, but you need to make notes of the Mac and IP address of the PC. I used ipconfig /all command to verified made notes of the MAC address and IP address of my PC, and then shut it down.
Downloading WOL Utility
There are many tools that you can use to trigger power on of a PC with WOL feature enabled. I used "MC-WOL.EXE" utility. This utility is a DOS command line utility that sends a "Magic Packet" to trigger power on of remote computer. MC-WOL.EXE can be download at http://www.matcode.com/wol.htm.
I have Windows 7 Operating System installed on my laptop. I downloaded MC-WOL.EXE and saved into C:\Users\LUE directory.
Testing
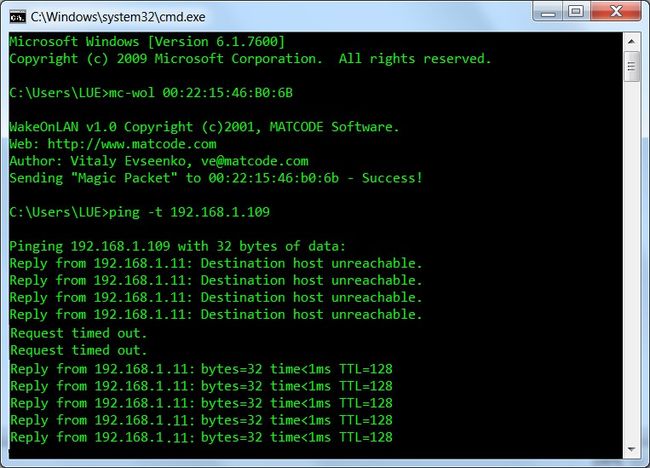
Now I tested WOL to watch my PC turn on using the following command. The 00:22:15:46:B0:6B is the mac address of the PC witch has WOL enabled.
mac-wol 00:22:15:46:B0:6B
If the PC with WOL enabled is not physically visible, you can use the ping command follow by -t string to test and see if the target PC is powered on or not. After a while, the ping should be successful as the screen shot bellow. If you have setup everything correctly and the target PC has Remote Desktop Connection enabled, you can remotely connect to it using Remote Desktop Connection.
