GUID Partiton Table
GPT ( GUID Partition Table ) is an alternative to the more common MBR ( Master Boot Record ) partition table.
The Big Difference
GPT disks are apart of Intel's BIOS preolacement called EFI. While the EFI boot process is minimalistic in it's approach, it did include a new partitioning specification based on GUIDs. The best feature of the new specification deals with the number of allowed partitons. GPT disks are NOT limited to four primary partitions Per the specifications, there is a limit of 128 partitons, each able to surpass the 2TB limitation of exended MBR disks, which is a huge step forward. <ref> Intel GPT White Paper 1.0, December 2009 http://www.intel.com/support/motherboards/server/sb/CS-031158.htm </ref> Another major advantage of GPT disks centers around the location of the partition table. While the partiton table is only stored in one location with a MBR disk, there are two locations with a GPT disk, providing some redundancy and resiliency in the event of hardware failure.
While windows 7 supports GPT disk drives, it does not boot from GPT partitons. If windows is involved, and GPT partitions are wanted, I recommend using two hard drives, one with windows and a linux-swap partition, the other with freeBSD/linux/solaris/unix partitons. AFAIK, Windows server 2008+ supports booting from GPT disks, but there are no good examples of their configurations.
GNU/Linux How-To
Creating and booting from a GPT disk in linux is not difficult, but the process requires the use of some buried tools and options. Is is important to note that many of the currently included CLI utilities do not support GPT. Do not fear, as there are alternatives which can be installed from most distribution repositories. This walkthrough uses the ubuntu 10.04 desktop installation cd. For following this walkthrough, I would also recommend a mint liveCD or Knoppix, as they are both Debian based.
Booting a LiveCD
This walkthrough makes uses of a liveCD. If you can already boot a LiveCD, proceed to the next section. If you are not familiar with the term, a liveCD runs an operating system off of a CD, allowing the user to either test a new Operating System and/or run Utilities.
Grab a recent liveCD from your favorite distro as long as gParted is an included package, insert it into your cd-rom, dvd-rom, or br-rom drive, and reboot.
Enter your Bios by pressing the key sequence displayed during or before your systems POST test. Usually this is the "del" key the "esc" key or a "F#" key. Once in your system's bios there should be a "Boot Device Priority" menu. Move or make sure your optical drive or drives are at the 'top of the list. save your settings, usually "F10" which will cause your system to reboot a second time.
While your system boots a text option to press either a certain key combination or any key should appear. Follow these instructions, and get a good cup of coffee. I recommend Sumatra as a single-origin coffee. By the time your back at your desk, there should be a desktop environment at the ready.
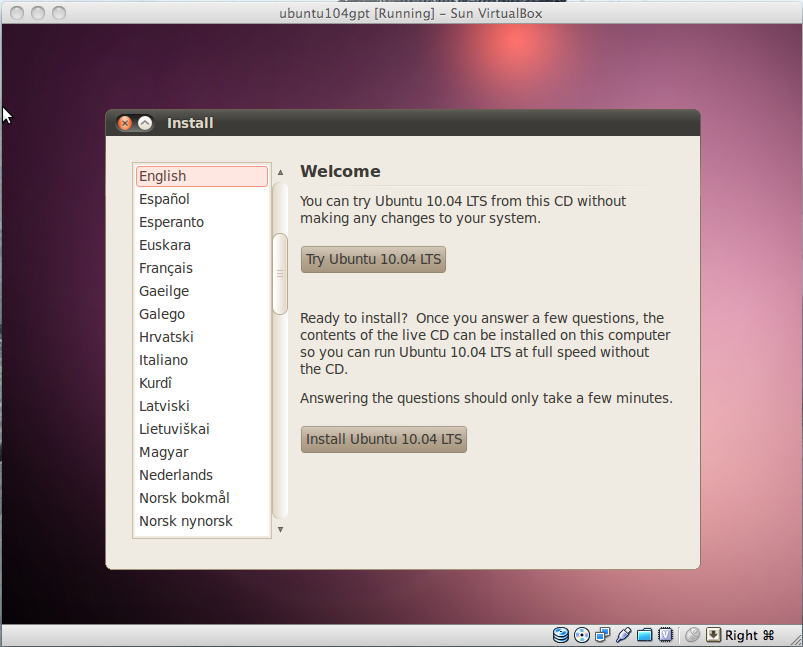
Your system should look something like this (if using ubuntu disk)
GParted Configuration
GParted is the "GNOME partition editor for creating, reorganizing, and deleting disk partitions."<ref gparted man page, http://gparted.sourceforge.net/docs/man-page/C/gparted.8.html /ref> Disclaimer: While this tool is great addition to a LiveCD, I have had mixed results when using it on an existing install.
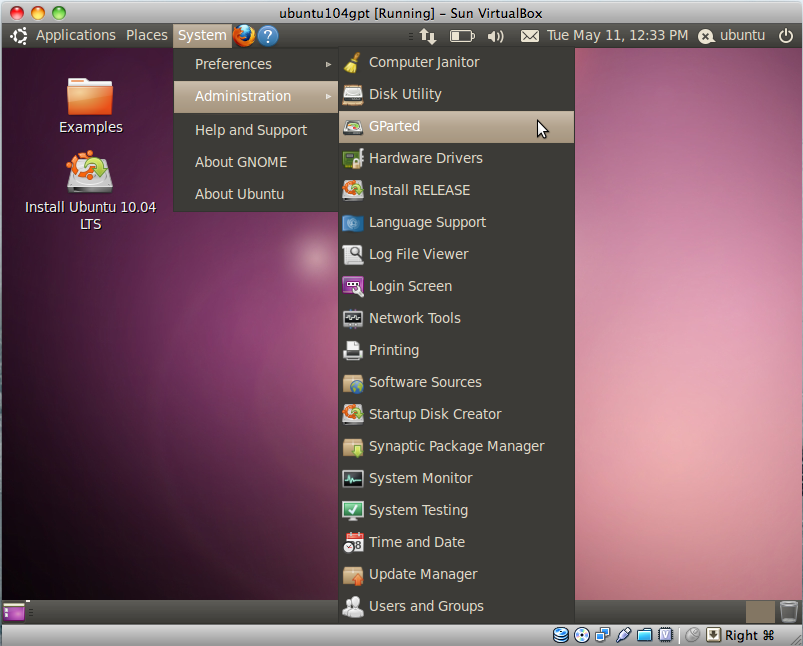
Start GParted
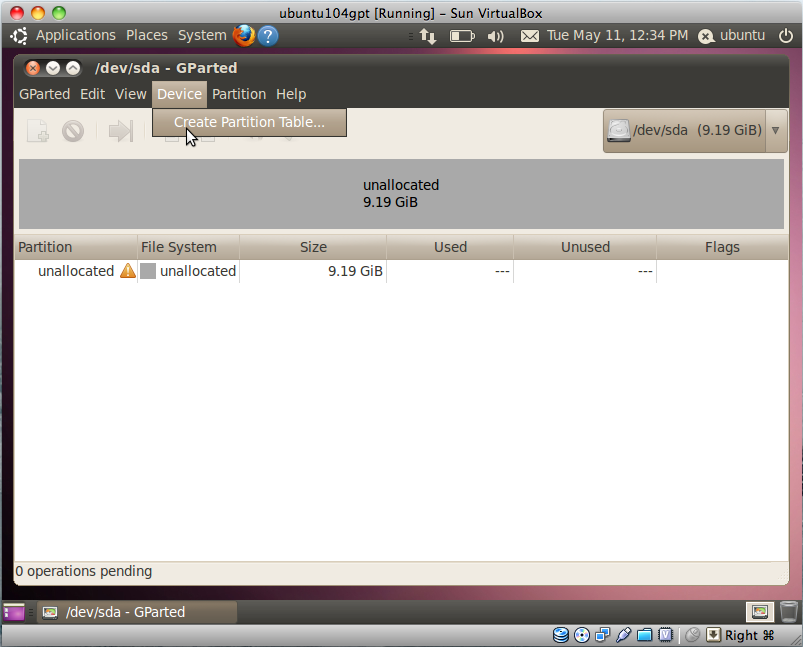
Create a new Partition Table
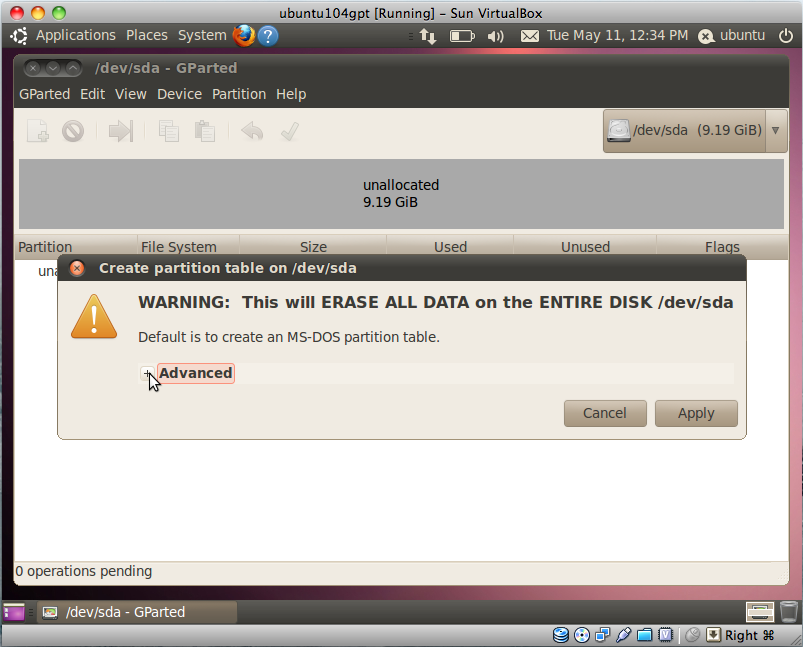
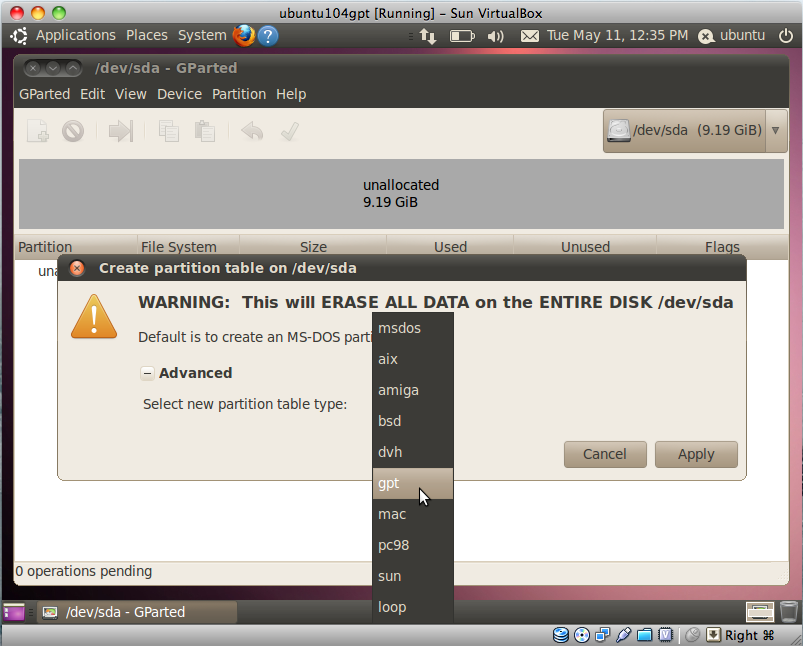
Select the GPT option
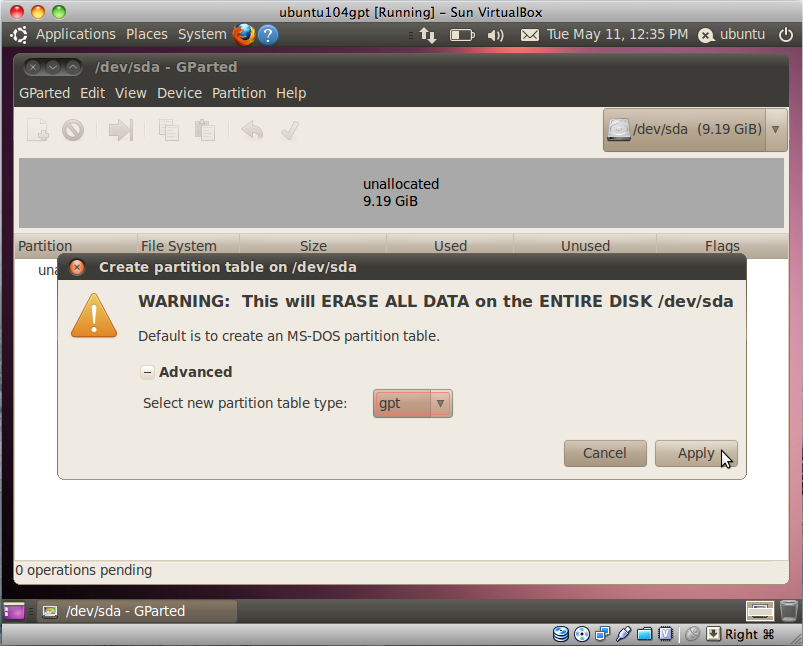
Apply the GPT settings
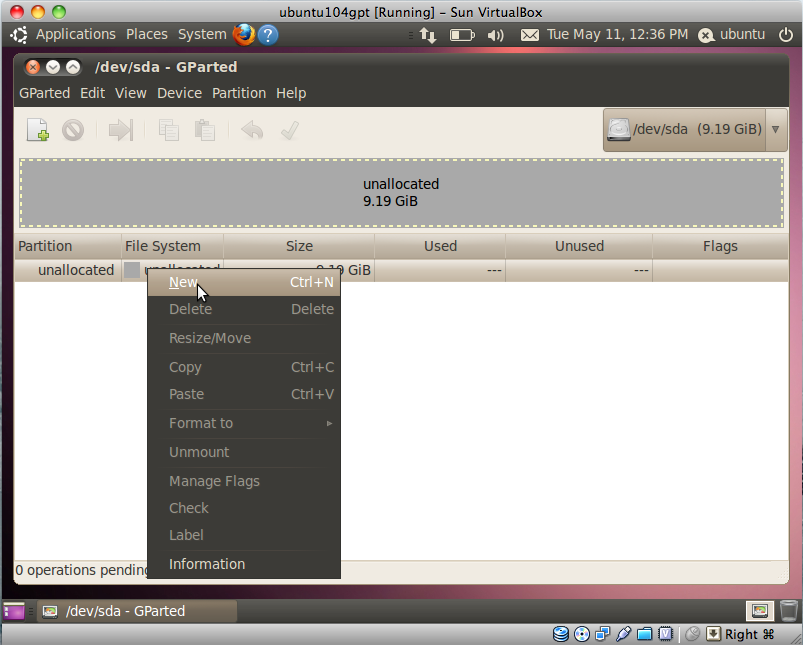
Create your first GUID Partition
CLI Tools for GPT partitions
Due to the relatively recent appearance of the GUID Partition Table standard, there are only a few Command Line Tools which can recognize and or manipulate GPT partitions.
Currently, the makers of fdisk have released a GPT compatible utility "gdisk" which can be run from the command line ( CLI ). Also there is the freeBSD "gpt" utility.
Works Cited
<references/>
