|
|
| (48 intermediate revisions by 2 users not shown) |
| Line 1: |
Line 1: |
| | == How to Install a Local Printer == |
|
| |
|
|
| |
|
| | Click Start >> Control Panel >> Printers and other Hardware >> Printers & Faxes >> double click Add Printer to start the Add Printer Wizard. |
| | If your printer is plug and play you don’t need to do this step. You just need to attach the printer to your computer and turn it on. Windows will automatically detect and install the printer or ask you to locate the driver. |
|
| |
|
| When a router is stuck in Rommon mode, one of the following is the cause.
| |
|
| |
|
| . Configuration register value. | | [[File:Pr2.jpg]] |
|
| |
|
| . Unable to locate a valid Cisco IOS software image.
| |
|
| |
|
| . Corrupt Flash image. | | Click Local Printer and no checkmark on Automatically detect and install. |
| | Click Next. |
|
| |
|
|
| |
|
| | [[File:Pr3.jpg]] |
| | | |
| == '''Check Configuration Register Settings''' ==
| |
|
| |
|
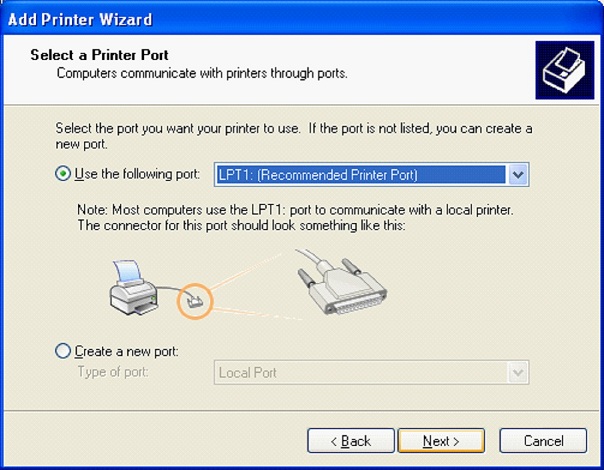
| | Select the Port your printer attached to. |
|
| |
|
|
| |
| If the router is stuck in ROMmon mode, the first setting that should be checked is the value of the configuration register.
| |
| The first four bits of the configuration register comprise the boot field. The value of the boot field defines the source of a default Cisco IOS® software image that will be used to run the router. If the value of the boot field is 0 (configuration register value of XXX0), on startup the system enters and remains in the ROM monitor mode (rommon>), awaiting a user command to boot the system manually.
| |
| If your router keeps entering the ROMmon mode each time the system is restarted, it is probably due to the setting of the configuration register. To verify the configured value of the configuration register, use the confreg command as shown below:
| |
|
| |
|
| |
| rommon 2 > confreg
| |
|
| |
| Configuration Summary
| |
| enabled are:
| |
|
| |
| load rom after netboot fails
| |
|
| |
|
| console baud: 9600
| | [[File:Pr4.jpg]] |
|
| |
|
| boot: the ROM Monitor
| |
|
| |
|
| | If the printer is in the list select your printer manufacturer and printer model here. |
| | If you have the driver on disk or different location click Have Disk and browse and locate the driver. |
|
| |
|
| do you wish to change the configuration? y/n [n]:
| | [[File:Pr5.jpg]] |
|
| |
|
| As indicated by the output of the confreg command above, the configuration register is set to a value that forces the router to go into the ROMmon mode each time it is reloaded or power-cycled. To make the router boot automatically from a default Cisco IOS software image, change the configuration register value as shown below:
| |
| rommon 2 > confreg
| |
|
| |
|
| Configuration Summary
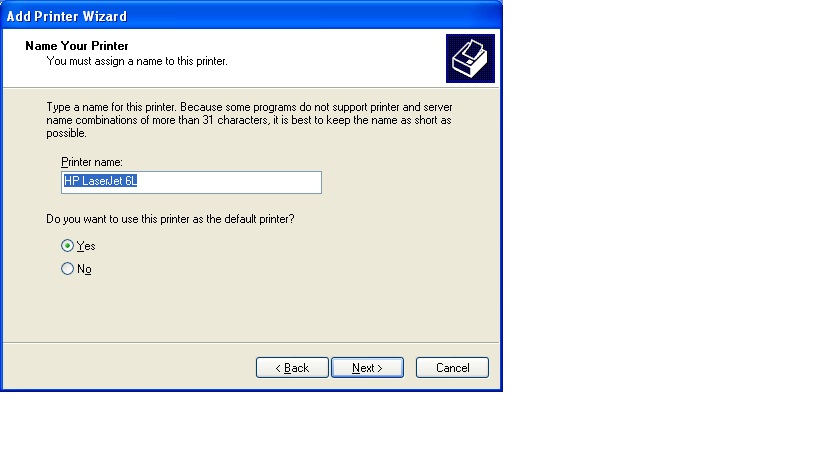
| | Name your Printer- this is a name you will use to select it. |
| enabled are:
| |
|
| |
|
| load rom after netboot fails
| |
|
| |
|
| console baud: 9600
| | [[File:Pr7.jpg]] |
|
| |
|
| boot: the ROM Monitor
| |
|
| |
|
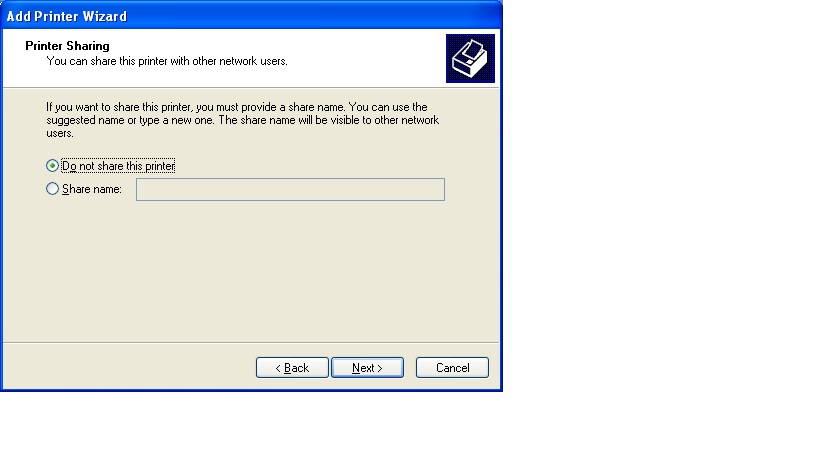
| do you wish to change the configuration? y/n [n]: y | | Printer sharing - Click do not share this printer. |
|
| |
|
| enable "diagnostic mode"? y/n [n]:
| | [[File:Pr8.jpg]] |
|
| |
|
| enable "use net in IP bcast address"? y/n [n]:
| |
|
| |
|
| disable "load rom after netboot fails"? y/n [n]:
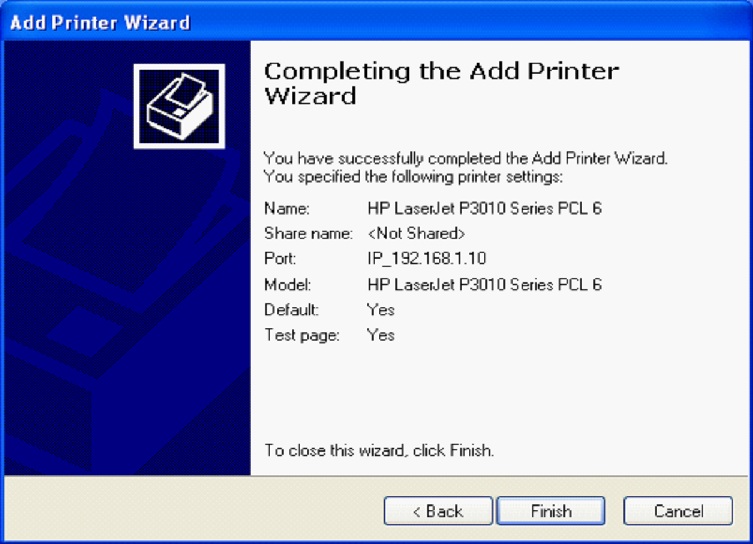
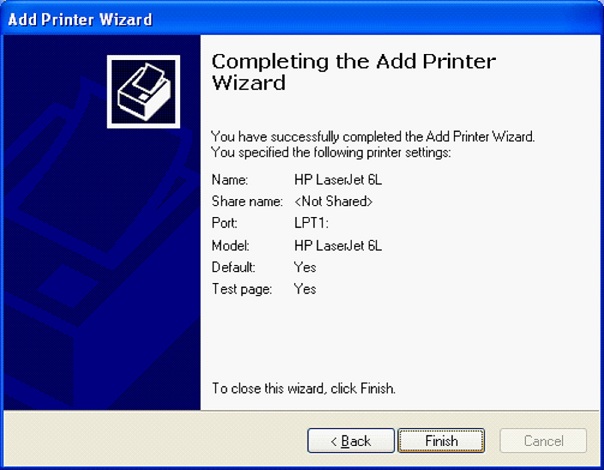
| | Completing the Add Print wizard - Review your choices and click back if you need to make some changes. Then Click Finish. |
|
| |
|
| enable "use all zero broadcast"? y/n [n]:
| |
|
| |
|
| enable "break/abort has effect"? y/n [n]:
| | [[File:Pr6.jpg]] |
|
| |
|
| enable "ignore system config info"? y/n [n]:
| |
|
| |
|
| change console baud rate? y/n [n]:
| |
|
| |
|
| change the boot characteristics? y/n [n]: y
| | == How to Setup a Printer for Sharing == |
|
| |
|
| enter to boot:
| |
|
| |
|
| 0 = ROM Monitor
| | On the computer that is physically connected to the printer to be shared: Start >> Control Panel >> Printers and other Hardware >> Printers & Faxes >> Right-click the printer icon >> choose Sharing >> Click Share this printer and enter Share name and then OK. |
| 1 = the boot helper image
| |
| 2-15 = boot system
| |
| [0]: 2
| |
|
| |
|
| Configuration Summary
| | [[File:Sp1.jpg]] |
| enabled are:
| |
|
| |
|
| load rom after netboot fails
| |
|
| |
|
| console baud: 9600
| | If you are sharing the printer with users running different versions of Windows. Click Additional Drivers and Install additional drivers. |
|
| |
|
| boot: image specified by the boot system commands or default to: cisco2-C2600
| | [[File:Sp2.jpg]] |
|
| |
|
|
| |
|
| do you wish to change the configuration? y/n [n]: n
| |
|
| |
|
| You must reset for new config to take effect.
| |
|
| |
|
| By doing this, you have changed the configuration register to a value that makes it look for a valid Cisco IOS software image on startup and boot from the same. The router must now be reset.
| | == How to use a Shared Network Printer == |
|
| |
|
| rommon 3 > reset
| |
|
| |
|
| | On computers not physically attached to shared printer: Click Start >> Control Panel >> Printers and other Hardware >> Printers & Faxes >> double click Add Printer. Select Network Printer. |
|
| |
|
| The router should now reload with a valid Cisco IOS software image.
| | [[File:Sp3.jpg]] |
|
| |
|
|
| |
|
| == '''Look for a Valid Image in Flash''' ==
| | You can connect to Network Printer three ways here using Browse for a printer, Name or URL |
|
| |
|
| | [[File:Sp5.jpg]] |
| | | |
| If the configuration register value is set to make the system boot automatically from a default Cisco IOS software image, and if no break signal is sent during start up, the router should boot normally. However, if the router still enters the ROMmon mode, it is probably because the device is unable to locate a valid Cisco IOS software image.
| | Double-click the icon for the printer you want to install. Once the printer queue is displayed, the printer has been installed. |
| The first thing you need to do then is to look for a valid Cisco IOS software image. To do this, issue the dir <device> command for each available device, and look for a valid Cisco IOS software image. For example, to look for the IOS in the Flash, use the command shown below.
| | After you have set up a network printer, you can use it as if it were attached to your computer. |
| | |
| rommon 1 > dir flash:
| |
| | |
| ----
| |
| | |
| File size Checksum File name
| |
|
| |
| 5358032 bytes (0x51c1d0) 0x7b16 c2600-i-mz.122-10b.bin
| |
| | |
| ----
| |
| | |
| | |
| rommon 2 >
| |
| | |
| Note that if the router returns the "bad device name" message, the device specified probably does not exist. The output above indicates that a valid image is indeed present in the Flash. Try to boot from that image using the boot command.
| |
| | |
| rommon 2 > boot flash:c2600-i-mz.122-10b.bin
| |
| | |
| program load complete, entry point: 0x80008000, size: 0x51c0dc
| |
| Self decompressing the image : #################################################
| |
| | |
| | |
| The router should now boot with the Cisco IOS software image specified in the boot command. However, there are times when a valid image does not exist on any of the devices or the image on the Flash might be corrupted. In these cases, a valid image has to be downloaded using Trivial File Transfer Protocol (TFTP) or by using the Xmodem procedure. Both these procedures can be carried out from the ROMmon mode.
| |
|
| |
| | |
| | |
| | |
| == '''Download using TFTP from ROMmon''' ==
| |
| | |
| | |
|
| |
| | |
| Step 1 Specify the required variables, for example:
| |
| | |
| rommon 1> IP_ADDRESS=172.15.19.11 -IP address for the router you are using.
| |
| | |
| rommon 2> IP_SUBNET_MASK=255.255.255.0 -Subnet mask for the router you are using.
| |
| | |
| rommon 3> DEFAULT_GATEWAY=172.16.19.1 -Default gateway for the router you are using
| |
| (not required if the TFTP server is in the
| |
| same subnet as the router).
| |
| | |
| rommon 4> TFTP_SERVER=172.15.20.10 -IP address of the server from which you want to
| |
| download the image file.
| |
| | |
| | |
| rommon 5> TFTP_FILE=/tftpboot/c2600-i-mz -Name of the file that you want to download.
| |
| | |
| rommon 6>tftpdnld -Starts the process.
| |
|
| |
|
| Do you wish to continue? y/n [n]:y
| |
|
| |
|
| | == How to Install a Network Printer == |
|
| |
|
| | Click Start >> Control Panel >> Printers and other Hardware >> Printers & Faxes >> double click Add Printer to start the Add Printer Wizard. |
|
| |
|
| == '''Download using Xmodem from ROMmon''' ==
| | Click Local Printer and no checkmark on Automatically detect and install. |
| | Click Next. |
|
| |
|
| | [[File:Pr3.jpg]] |
|
| |
|
| The xmodem command establishes a connection between a console and the router console port for disaster recovery, if both the boot and system images are erased from flash memory.
| |
|
| |
|
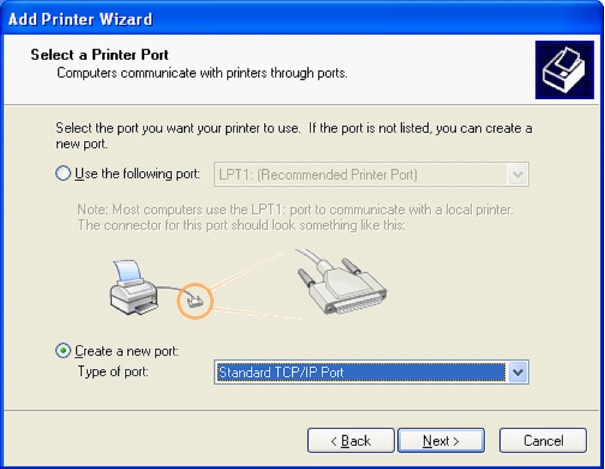
| | Click Create a new port and choose Standard TCP/IP Port. |
|
| |
|
| '''''Step 1''''' Connect a console to the router's console port.
| | [[File:Np1.jpg]] |
|
| |
|
| '''''Step 2''''' Power up the router. The power-on self-test diagnostics run and the boot ROM searches for a valid boot image and Cisco IOS image in flash memory. If the boot image and Cisco IOS image are not found, the ROM monitor prompt is displayed:
| |
|
| |
|
| rommon 1>
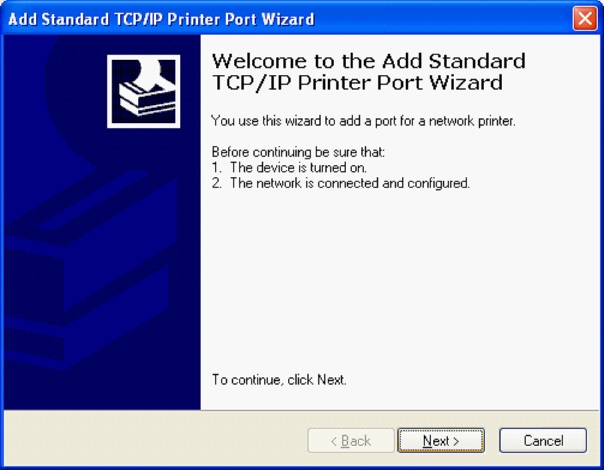
| | Click Next on Welcome to the Add Standard TCP/IP Printer Port Wizard. |
|
| |
|
| '''''Step 3''''' Enter the xmodem command and the name of the source file containing the Cisco IOS image:
| |
|
| |
|
| rommon 1> xmodem filename
| | [[File:Np2.jpg]] |
|
| |
|
|
| |
|
| When the source file is found, messages similar to the following appear:
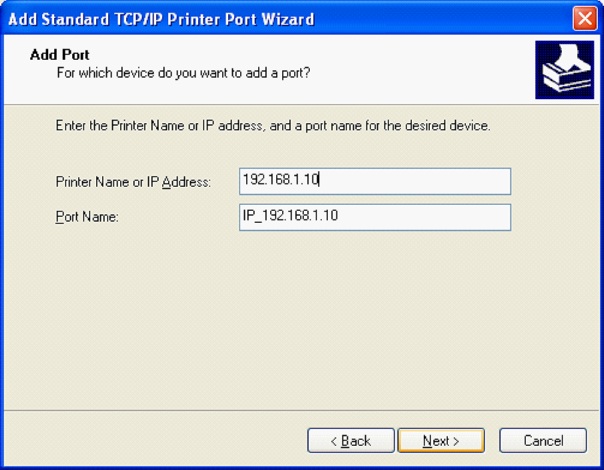
| | Enter IP address assigned to the Printer. |
|
| |
|
| ----
| | [[File:Np3.jpg]] |
|
| |
|
| Do not start upload program yet...
| |
|
| |
|
| File size Checksum File name
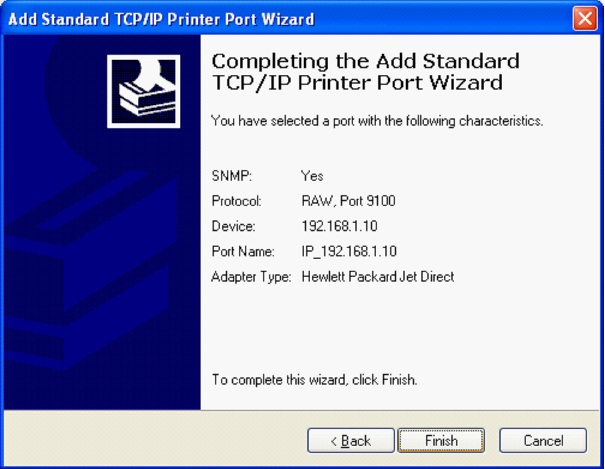
| | Revise your selection and Click Finish. |
|
| |
|
| 2537948 bytes (0x26b9dc) c2600-i-mz.122-10.bin
| | [[File:Np4.jpg]] |
|
| |
|
|
| |
|
| WARN: This operation will ERASE bootflash. If the xmodem
| | Click Have Disk to locate the printer driver. |
|
| |
|
| download to bootflash fails, you will lose any good image
| |
|
| |
|
| you may already have in bootflash.
| | [[File:Np5.jpg]] |
|
| |
|
| Invoke this application only for disaster recovery.
| |
|
| |
|
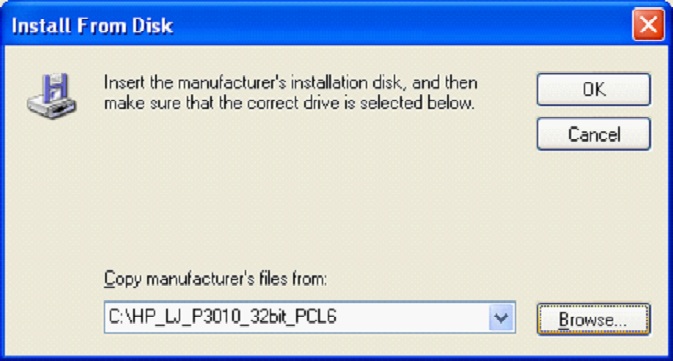
| | Once you Browse and select the correct drive. Click OK. |
|
| |
|
| Do you wish to continue? [yes/no]:
| | [[File:Np6.jpg]] |
|
| |
|
| ----
| |
|
| |
|
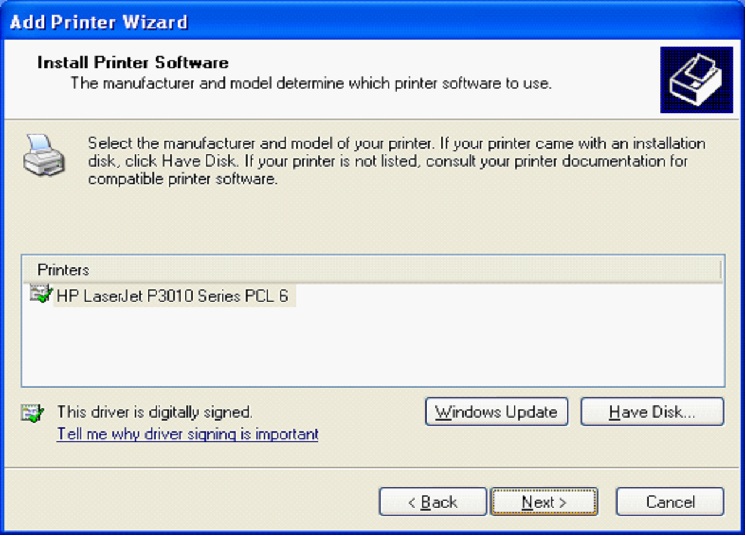
| | Click Next at Install Printer Software. |
|
| |
|
| '''''Step 4''''' Enter yes to copy the Cisco IOS image into flash memory. Messages similar to the following appear:
| | [[File:Np7.jpg]] |
|
| |
|
| ----
| |
|
| |
|
| Ready to receive file prog ...
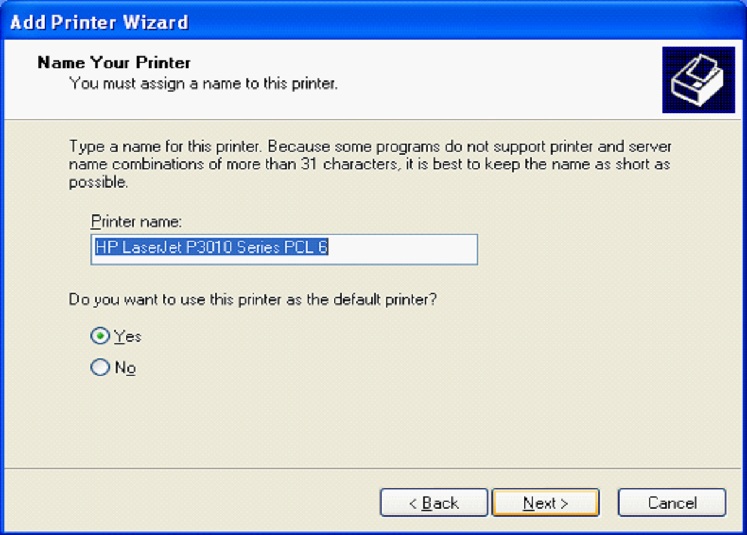
| | Name your printer and Click Next. |
|
| |
|
| | [[File:Np8.jpg]] |
|
| |
|
| Erasing flash at 0x3000000
| |
| program flash location 0x3000000
| |
|
| |
|
| | You have successfully completed adding a Network Printer. Click next to Finish and Print test page. |
|
| |
|
| Transfer complete!
| |
|
| |
|
| ----
| | [[File:Np9.jpg]] |
|
| |
|
| The router is now ready to boot from the Cisco IOS image and need to be reset.
| | [[File:Np10.jpg]] |
How to Install a Local Printer
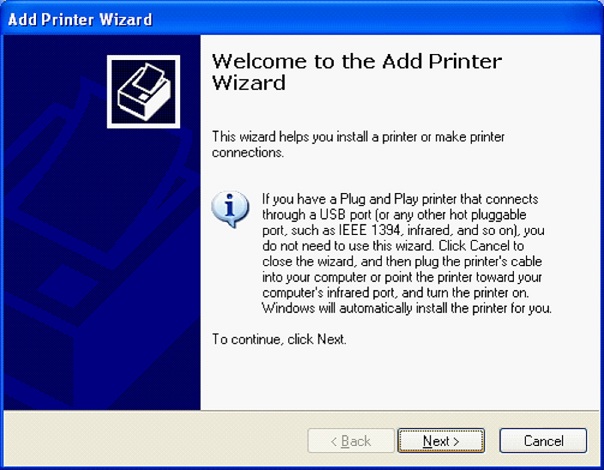
Click Start >> Control Panel >> Printers and other Hardware >> Printers & Faxes >> double click Add Printer to start the Add Printer Wizard.
If your printer is plug and play you don’t need to do this step. You just need to attach the printer to your computer and turn it on. Windows will automatically detect and install the printer or ask you to locate the driver.
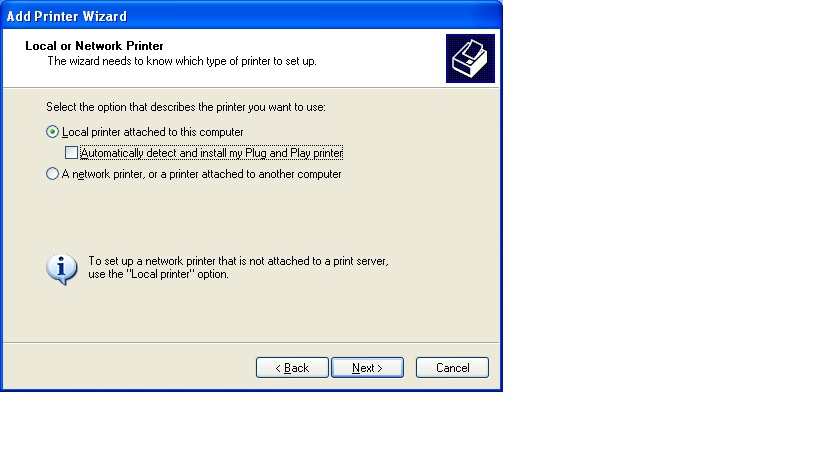
Click Local Printer and no checkmark on Automatically detect and install.
Click Next.
Select the Port your printer attached to.
If the printer is in the list select your printer manufacturer and printer model here.
If you have the driver on disk or different location click Have Disk and browse and locate the driver.

Name your Printer- this is a name you will use to select it.
Printer sharing - Click do not share this printer.
Completing the Add Print wizard - Review your choices and click back if you need to make some changes. Then Click Finish.
How to Setup a Printer for Sharing
On the computer that is physically connected to the printer to be shared: Start >> Control Panel >> Printers and other Hardware >> Printers & Faxes >> Right-click the printer icon >> choose Sharing >> Click Share this printer and enter Share name and then OK.
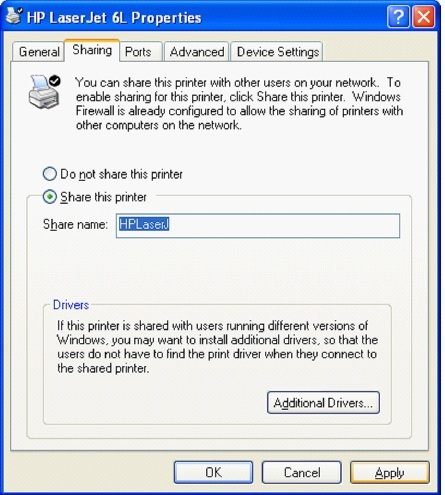
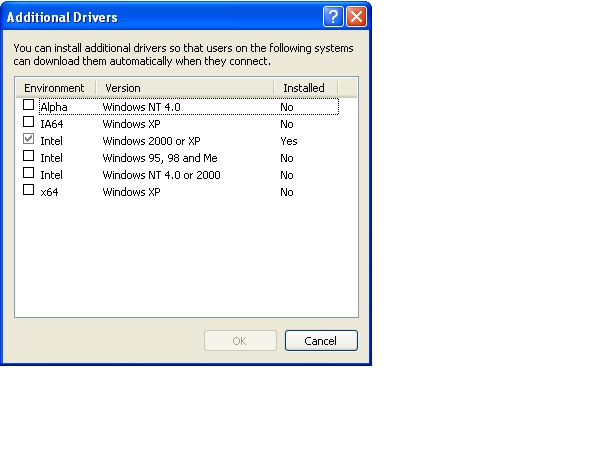
If you are sharing the printer with users running different versions of Windows. Click Additional Drivers and Install additional drivers.
How to use a Shared Network Printer
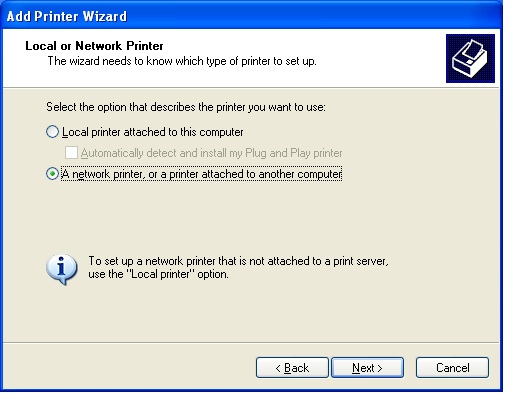
On computers not physically attached to shared printer: Click Start >> Control Panel >> Printers and other Hardware >> Printers & Faxes >> double click Add Printer. Select Network Printer.
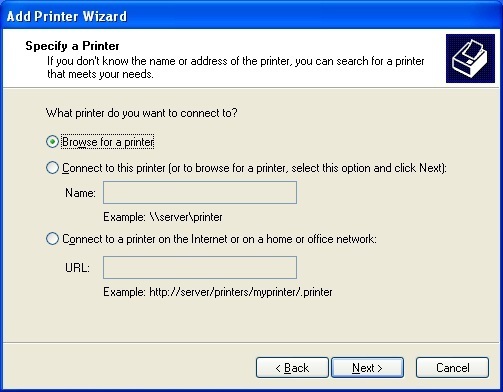
You can connect to Network Printer three ways here using Browse for a printer, Name or URL
Double-click the icon for the printer you want to install. Once the printer queue is displayed, the printer has been installed.
After you have set up a network printer, you can use it as if it were attached to your computer.
How to Install a Network Printer
Click Start >> Control Panel >> Printers and other Hardware >> Printers & Faxes >> double click Add Printer to start the Add Printer Wizard.
Click Local Printer and no checkmark on Automatically detect and install.
Click Next.
Click Create a new port and choose Standard TCP/IP Port.
Click Next on Welcome to the Add Standard TCP/IP Printer Port Wizard.
Enter IP address assigned to the Printer.
Revise your selection and Click Finish.
Click Have Disk to locate the printer driver.

Once you Browse and select the correct drive. Click OK.
Click Next at Install Printer Software.
Name your printer and Click Next.
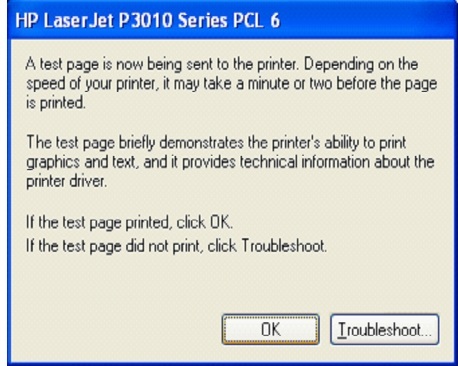
You have successfully completed adding a Network Printer. Click next to Finish and Print test page.