How to Install Ubuntu on Virtual Box: Difference between revisions
Jump to navigation
Jump to search
No edit summary |
No edit summary |
||
| Line 42: | Line 42: | ||
** Step 6 | ** Step 6 | ||
***[[file:step6.png]] | ***[[file:step6.png]] | ||
***[[file:step_7.png]] | |||
***[[file:step_8.png]] | |||
***[[file:step_9.png]] | |||
***[[file:step10.png]] | |||
***[[file:step_11.png]] | |||
***[[file:step_12.png]] | |||
Revision as of 15:54, 24 July 2010
How to install Ubuntu on Windows XP using a virtual box
Instuctions - By Jon Nelson
Software downloads needed
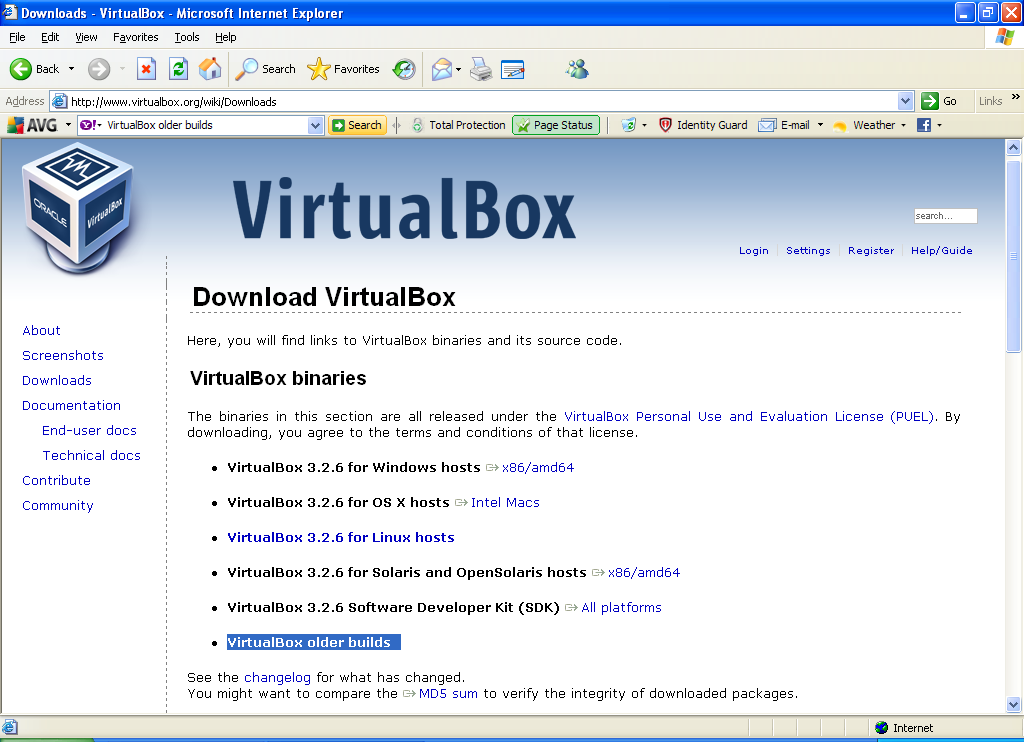
- Download Virtual box from Web page.
- Create a folder labeled Virtual Box on your PC
- Logon to the internet Type http://www.virtualbox.org/
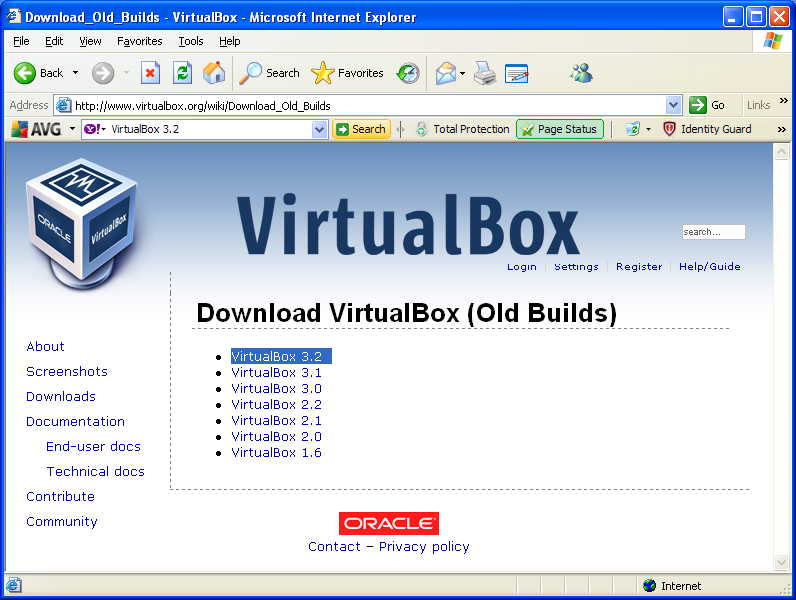
- For Windows XP select Virtual box Older builds
- Select option Virtual Box 3.2
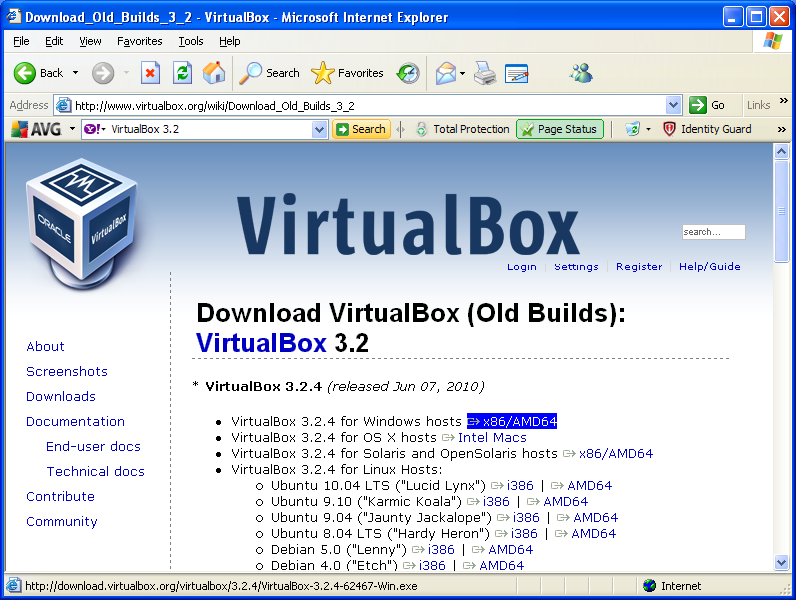
- Select first option for windows host
- Now save the file to the fold you created labeled Virtual box on your PC
- Once the download is complete then you can run the download.
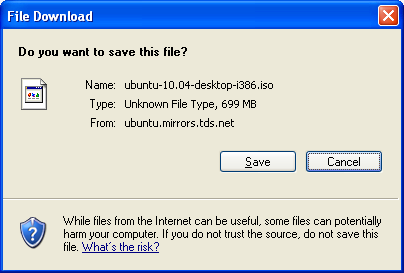
- Down Load Ubuntu
Installing Ubuntu on Virtual Box
- Open Virtual box application
- In the upper left hand corner of Virtual Box select create for a new operating system. a create wizard will appear. follow the steps below
- Step 1
- Step 2 - Name the operating system and select the type and version of the operating system as shown below.
- Step 3 - Select the amount of RAM to be used for the system. I used the defualt which is 512MB.
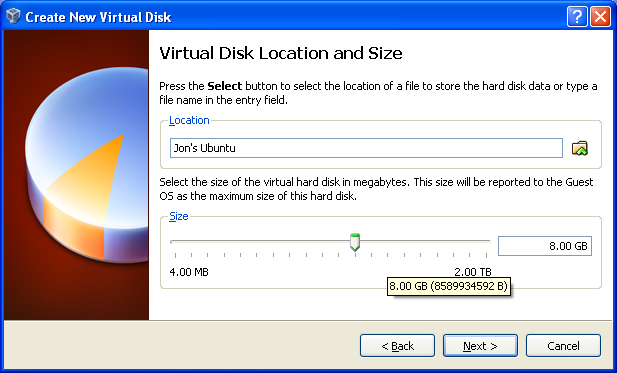
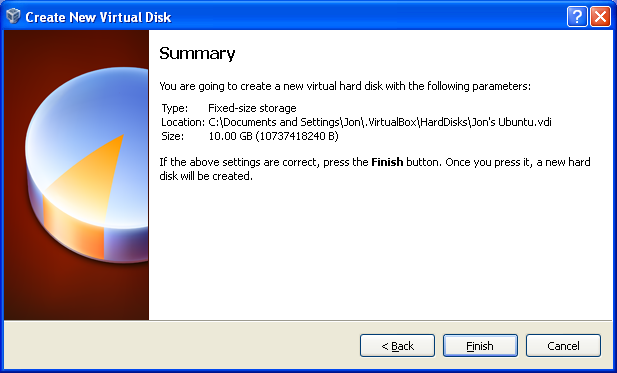
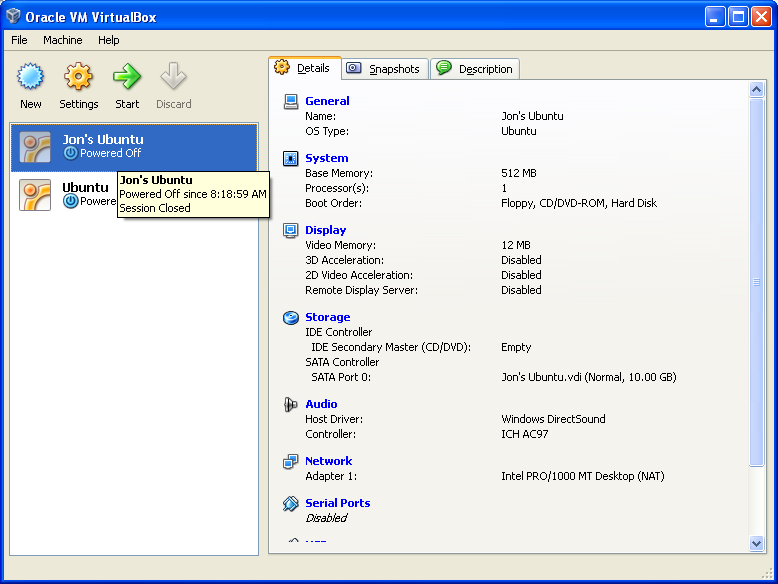
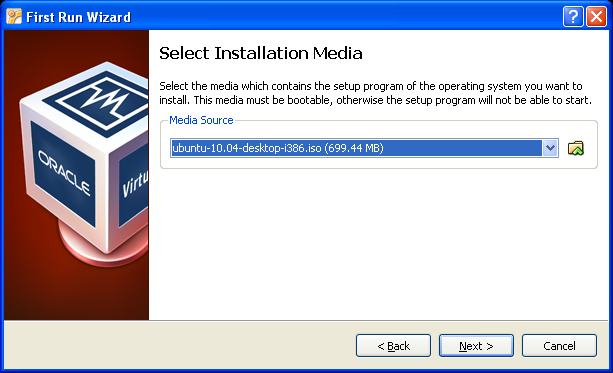
- Step 4
- Step 5
- Step 6
