Packet Tracer Instructions: Difference between revisions
| Line 82: | Line 82: | ||
The next step, I will show you how to use Package Tracer by building a basic network. | The next step, I will show you how to use Package Tracer by building a basic network. | ||
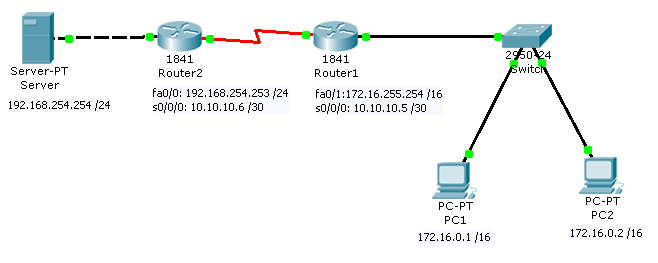
Below is the topology of the network. | Below is the topology of the network. I will use the IP Address in this topology to configure the network connection. | ||
[[File:pktt00.PNG|658px]] | [[File:pktt00.PNG|658px]] | ||
| Line 88: | Line 88: | ||
===Building Cisco equipment and hardware=== | ===Building Cisco equipment and hardware=== | ||
Follow the bellow steps to create the network topology above. | |||
*Step 1 | |||
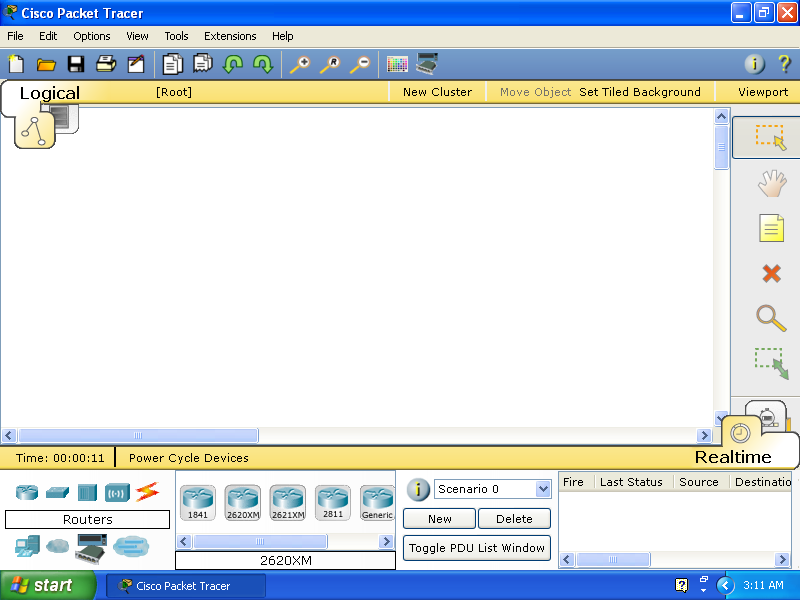
Double click the '''Cisco Package Tracer''' icon on the desktop, the Cisco Package Tracer windows will open as shown below: | Double click the '''Cisco Package Tracer''' icon on the desktop, the Cisco Package Tracer windows will open as shown below: | ||
| Line 93: | Line 99: | ||
*Step 2 | |||
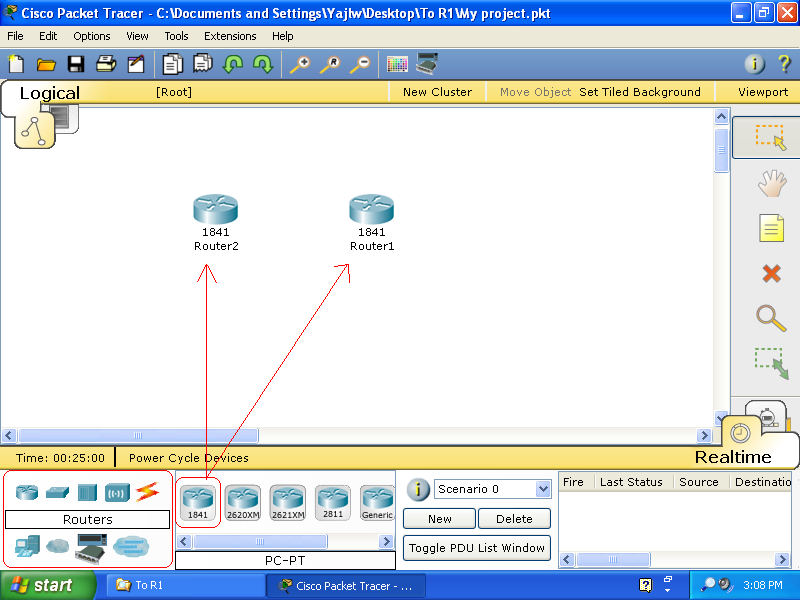
To create the router, click on the router icon locates on the bellow left-hand conner, and then click and draft the model you want to the root area. | |||
Revision as of 20:22, 28 February 2010
Package Tracer Instructions
Cisco Packet Tracer is a powerful network simulation program that allows us to create a network with an almost unlimited number of devices, encouraging practice, discovery, and troubleshooting. The main objective of Packet Tracer is to serve as a support tool for the Cisco Academy. This tool is extremely useful for both students and teachers. In this page, I will walk you through step by step of how to download, install and build a network lab that we use in the CCNA1 using Package Tracer. This instruction is best for a student who have an account to login to the Cisco Networking Academy home page.
Downloading & Installing Package Tracer
Packet Tracer 5.2 is the latest version of Cisco's simulation software available. To download Package Tracer, follow the instruction below:
How to download
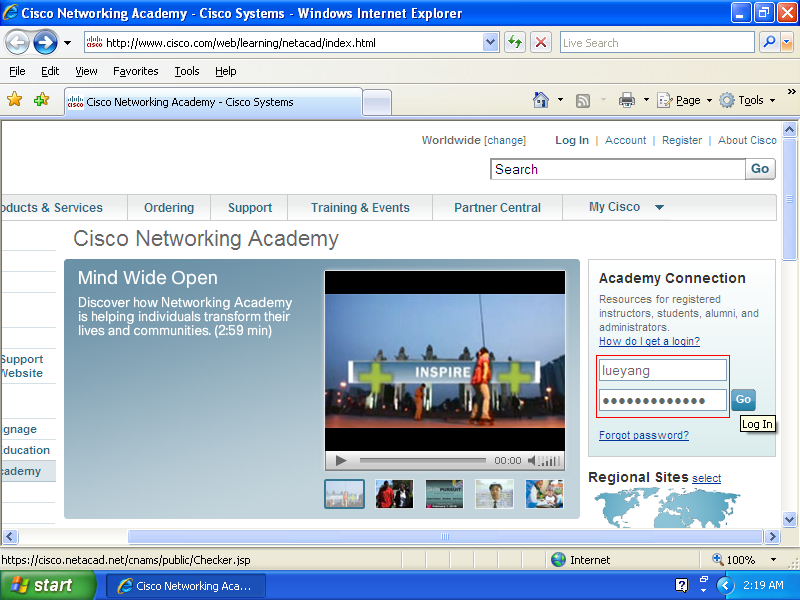
- Step 1
Go to Cisco Networking Academy home page
(NOTE: Make sure to hold Ctrl key to open the link in a new tab.)
- Step 2
Login onto the Student Home using your username and password.
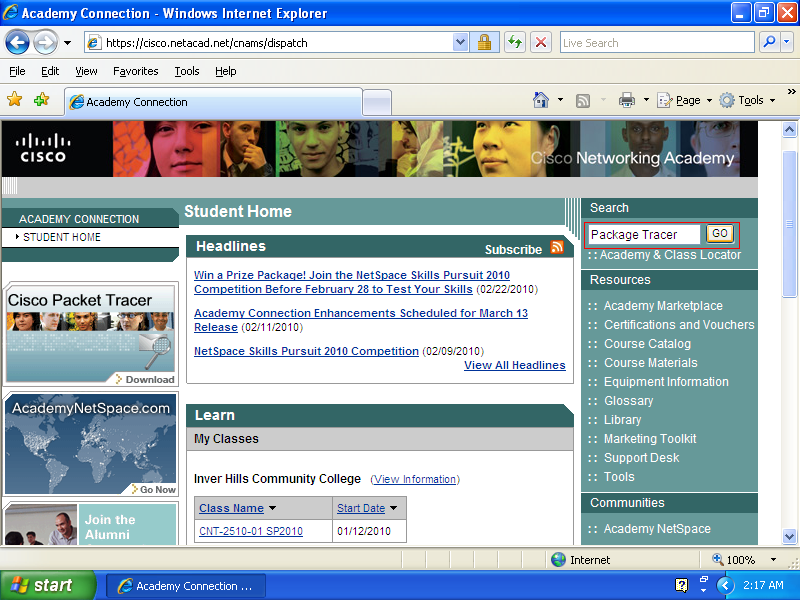
- Step 3
On the Student Home page, type Package Tracer in the search box and press GO or Enter key to search for the software.
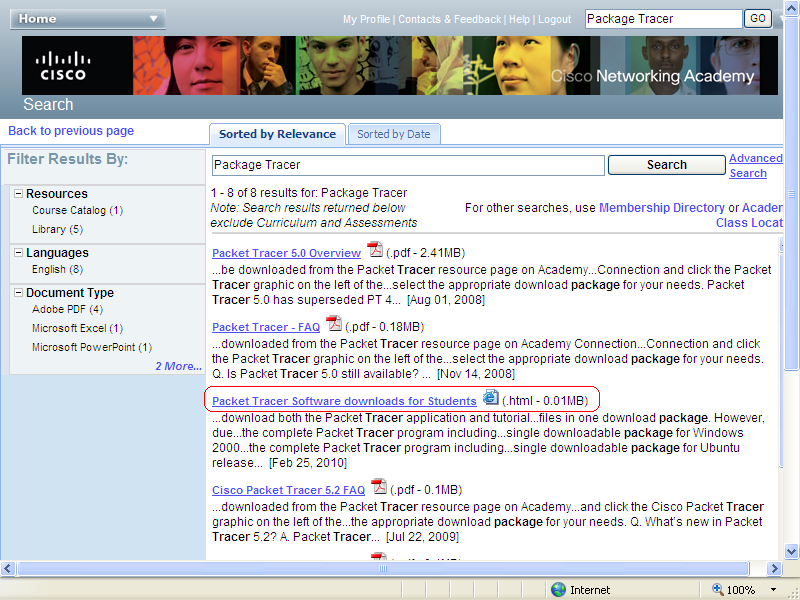
- Step 4
Scroll down to find Packet Tracer Software downloads for Students (.html - 0.01MB). Click on the link and a new windows will prompt.
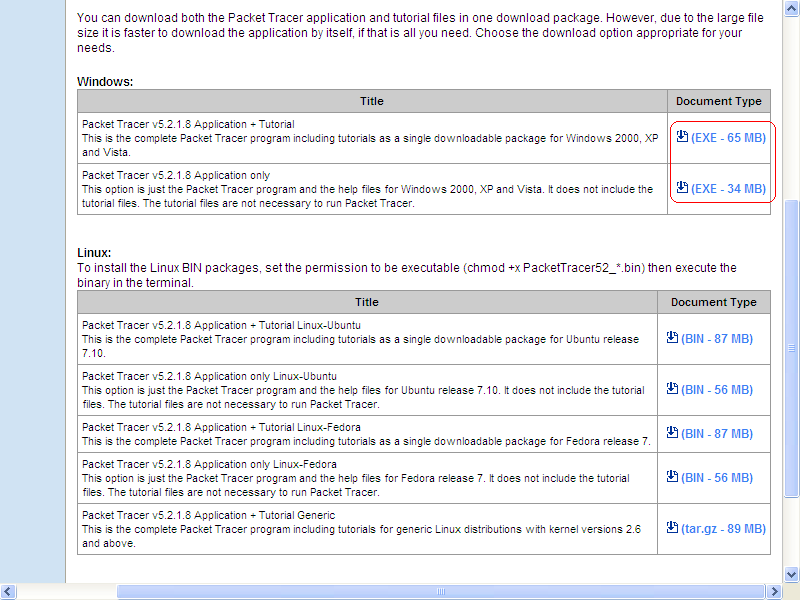
- Step 5
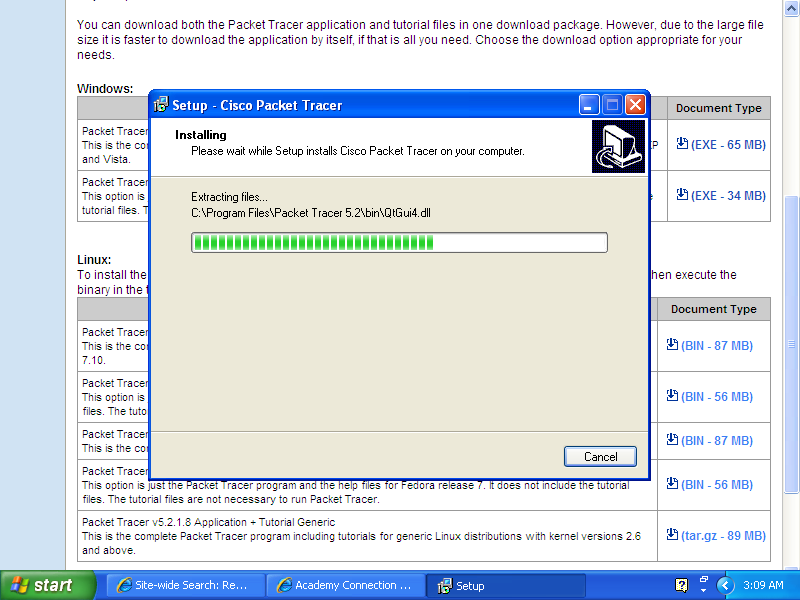
To download, click (EXE - 34 MB), or (EXE - 65 MB) if you want to include tutorials in a single package.
The Process of installation
- Step 1
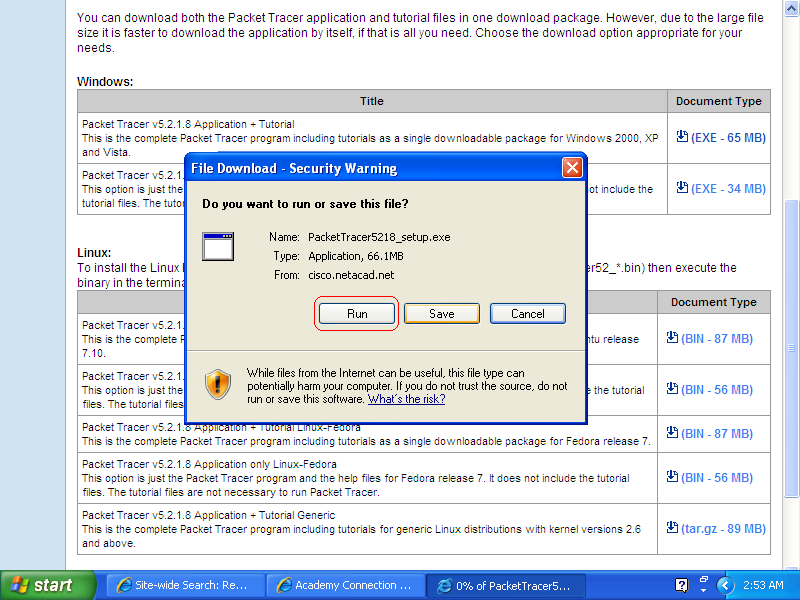
And, then click Run to run the installation process after downloaded.
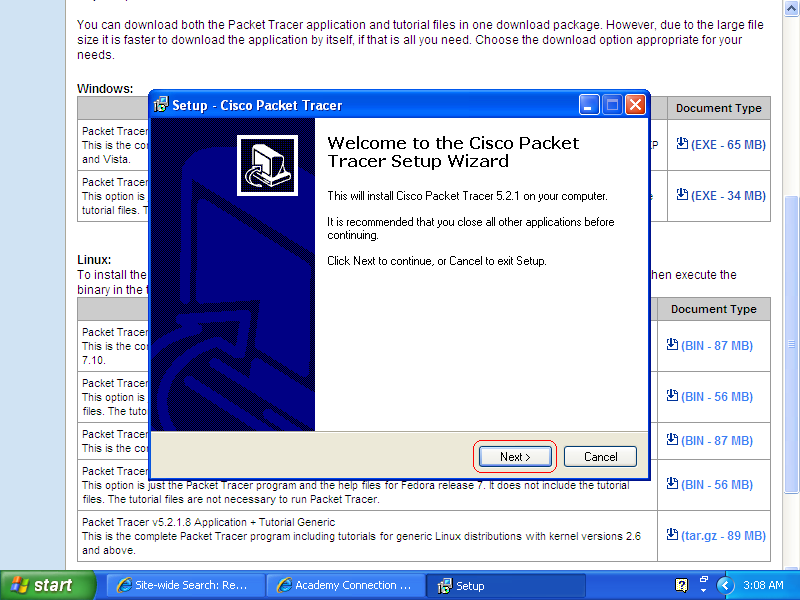
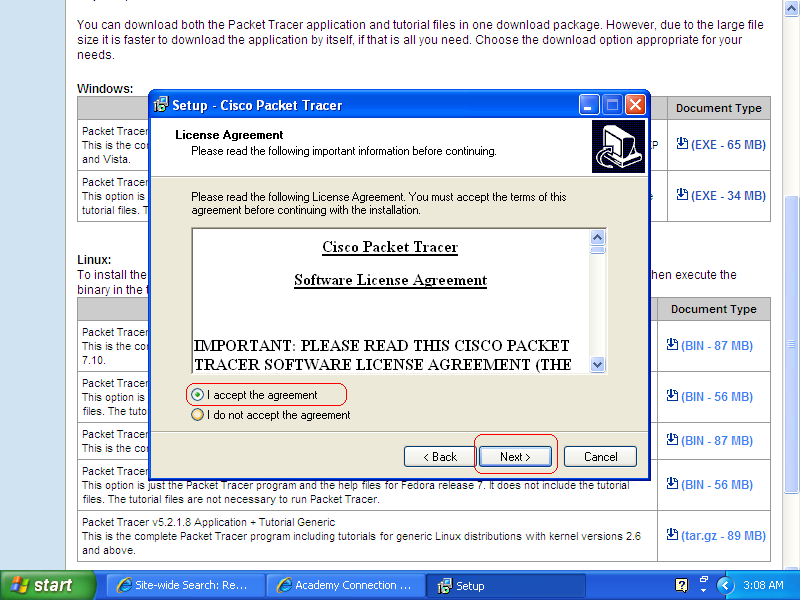
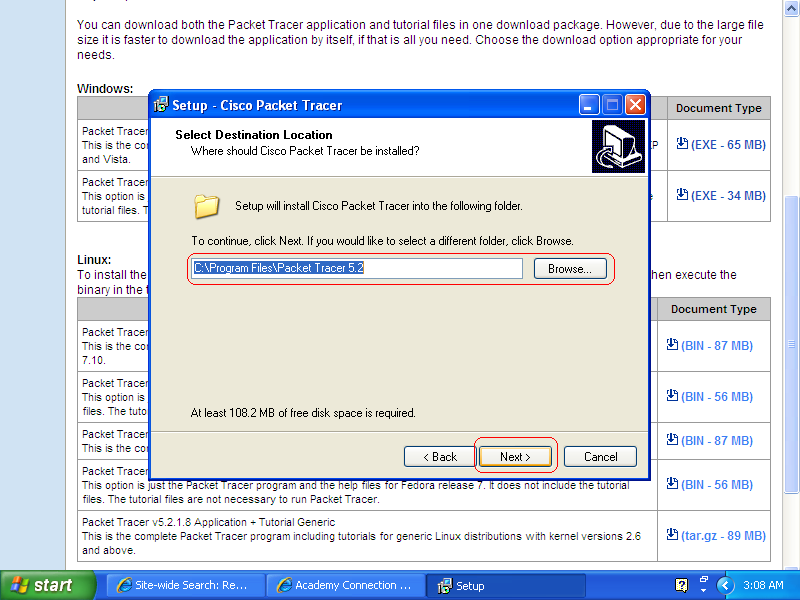
The screen shots below will show you through each step of the installation process.
- Step 2
Click next
- Step 3
In oder to install the software, you must check I accept the agreement and click the Next button.
- Step 4
- Step 5
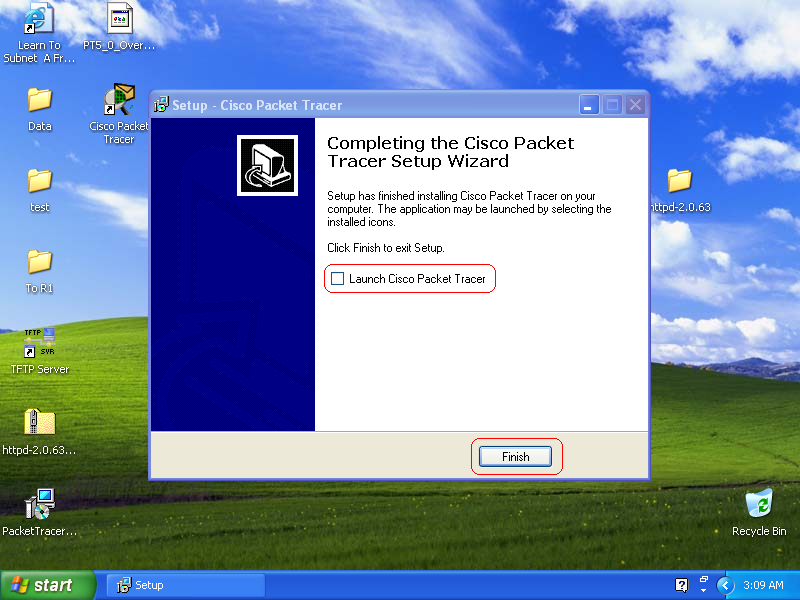
Click the Finish button.
Now you are completed with installation. The next step will show you how to use Cisco Package Tracer.
Using Cisco Package Tracer
The next step, I will show you how to use Package Tracer by building a basic network.
Below is the topology of the network. I will use the IP Address in this topology to configure the network connection.
Building Cisco equipment and hardware
Follow the bellow steps to create the network topology above.
- Step 1
Double click the Cisco Package Tracer icon on the desktop, the Cisco Package Tracer windows will open as shown below:
- Step 2
To create the router, click on the router icon locates on the bellow left-hand conner, and then click and draft the model you want to the root area.
