Multilayer Switching: Difference between revisions
No edit summary |
BenFranske (talk | contribs) (rv to correct information) |
||
| Line 1: | Line 1: | ||
________________________________________ | |||
'''''Password recovery of the Cisco Routers''''' | |||
''' | |||
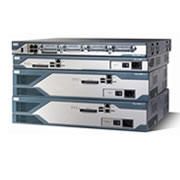
[[File:CiscoRouters.jpg]] | |||
In order for one to understand these instructions you have to have prior knowledge of what a router is and its basic function. | |||
'''1'''.Connect a computer to the router’s Console port using the Console cable that came with your router (it is usually flat and light blue). | |||
Use these Hyper terminal settings: | |||
* 9600 baud rate | |||
* No parity | |||
* 8 data bits | |||
* 1 stop bit | |||
* No flow control | |||
'''2'''. Turn the router off using the power switch and turn it back on. | |||
'''3'''. Once text starts popping up on the screen, send the break command CTRL + B or CTRL +BREAK (sometimes it is CTRL +X). This will abort the boot and present you with a rommon 1> prompt | |||
'''4'''. From the new prompt you need to change the configuration register using the following command: confreg 0×2142 | |||
'''5'''. If you are using an older model of router you may need to enter o/r 0×2142 | |||
'''6'''. Now you need to recycle the router with the reset command. | |||
''' | |||
'''7'''. If you used the o/r command then reset the router with the I command | |||
''' | '''8'''. Once the router finishes restarting you will find that there are no passwords to deal with, so you can enter enabled. | ||
'''9'''. Now, go into configuration mode with the config t command | |||
'''10''' .Once there enter the new password with the enable secret password | |||
''' | |||
'''11'''. Now set the configuration register back to normal with this command: confreg 0×2102 | |||
''' '''Password recovery on a Cisco 2950 switch'''''' | |||
'''1'''. Unplug the power cable | |||
'''2'''. Hold down the mode button while replugging the power cable | |||
'''3'''. Type flash_init over the console | |||
''' | |||
'''4'''. Type load_helper | |||
'''5'''. Type Dir flash : | |||
make sure to type the semi-colons | |||
'''6'''. Type rename flash:config.txt flash:config.old | |||
the password is contained in the config.txt file | |||
''' | |||
'''7'''. Type boot | |||
this reboots the system | |||
'''8'''. Type n to skip the initial setup configuration | |||
'''9'''. Type enable | |||
this takes you to the enable mode | |||
''' | |||
'''10'''. Type rename flash:config.old flash:config.txt | |||
'''11'''. Save config.txt to system | |||
#copy flash:config.txt system:running-config | |||
''' | '''12'''. Enter config mode and change the password | ||
# config t | |||
# no enable secret | |||
this applies only if the enable secret password was created | |||
'''13'''. Finally, write the changes to memory | |||
''' | |||
# write memory | |||
Revision as of 21:30, 4 August 2010
________________________________________
Password recovery of the Cisco Routers
In order for one to understand these instructions you have to have prior knowledge of what a router is and its basic function.
1.Connect a computer to the router’s Console port using the Console cable that came with your router (it is usually flat and light blue). Use these Hyper terminal settings:
- 9600 baud rate
- No parity
- 8 data bits
- 1 stop bit
- No flow control
2. Turn the router off using the power switch and turn it back on.
3. Once text starts popping up on the screen, send the break command CTRL + B or CTRL +BREAK (sometimes it is CTRL +X). This will abort the boot and present you with a rommon 1> prompt
4. From the new prompt you need to change the configuration register using the following command: confreg 0×2142
5. If you are using an older model of router you may need to enter o/r 0×2142
6. Now you need to recycle the router with the reset command.
7. If you used the o/r command then reset the router with the I command
8. Once the router finishes restarting you will find that there are no passwords to deal with, so you can enter enabled.
9. Now, go into configuration mode with the config t command
10 .Once there enter the new password with the enable secret password
11. Now set the configuration register back to normal with this command: confreg 0×2102
' Password recovery on a Cisco 2950 switch'
1. Unplug the power cable
2. Hold down the mode button while replugging the power cable
3. Type flash_init over the console
4. Type load_helper
5. Type Dir flash : make sure to type the semi-colons
6. Type rename flash:config.txt flash:config.old the password is contained in the config.txt file
7. Type boot this reboots the system
8. Type n to skip the initial setup configuration
9. Type enable this takes you to the enable mode
10. Type rename flash:config.old flash:config.txt
11. Save config.txt to system
- copy flash:config.txt system:running-config
12. Enter config mode and change the password
- config t
- no enable secret
this applies only if the enable secret password was created
13. Finally, write the changes to memory
- write memory
