Install audio card: Difference between revisions
No edit summary |
No edit summary |
||
| Line 3: | Line 3: | ||
==Installing Audio Card== | ==Installing Audio Card== | ||
* | *'''Step 1''' | ||
Install the audio card into the appropriate expansion slot. | Install the audio card into the appropriate expansion slot. | ||
| Line 66: | Line 64: | ||
[[File:cb2.70.jpg]] | [[File:cb2.70.jpg]] | ||
The audio card is now configured to the recording software. Rock n' Roll! | |||
Revision as of 03:35, 29 July 2010
This page will demonstrate how to install an audio card and configure it to work with recording software. In this tutorial, I will be using the M-Audio Delta AP192 1/2 audio card and Cubase recording software.
Installing Audio Card
- Step 1
Install the audio card into the appropriate expansion slot.
- Step 2
Secure the audio card to the case with the mounting bracket.
- Step 3
After reassembling your computer, power up and install driver CD-ROM.
- Step 4
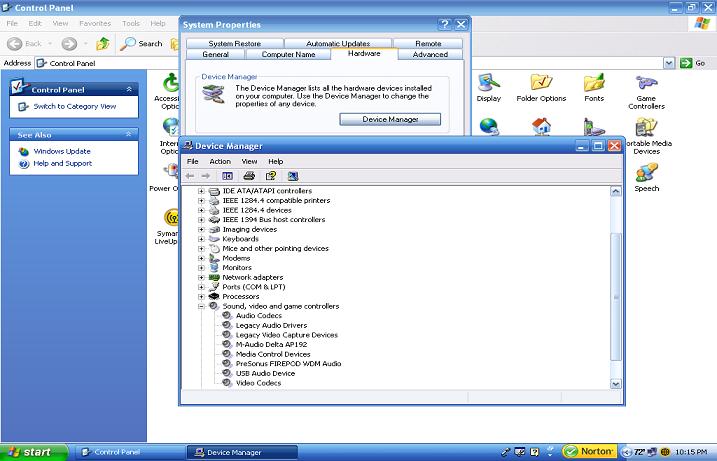
After installation of drivers is complete, check the device manager to verify that installation was successful.
Start>Control Panel>System>Hardwaretab>device Manager
Configure Windows to Sound Device
- Step 1
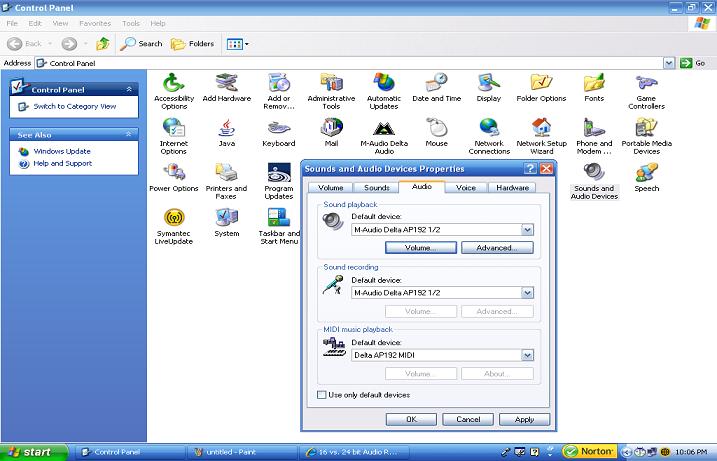
Start>Control Panel>Sounds and Audio Devices>Audio Tab
Change the default devices to the appropriate audio card.
- Step 2
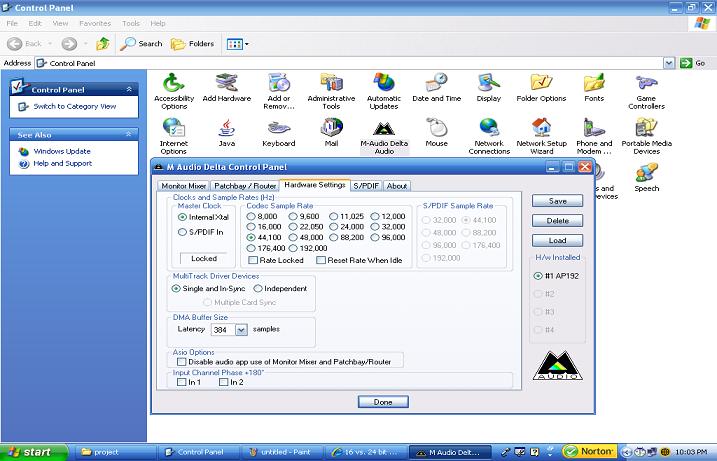
Set the sample rate
Start>Control Panel>M-Audio Delta Audio icon>Hardware Settings tab
Set Codec Sample Rate to 44,100.
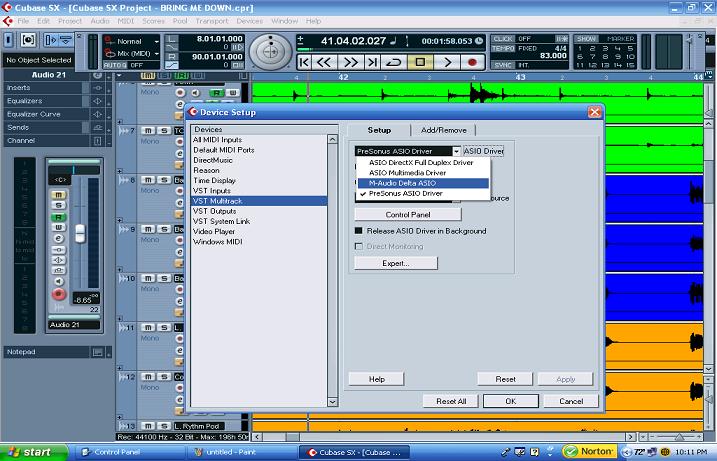
Configure Recording Software
- Step 1
Open a new session of Cubase
- Step 2
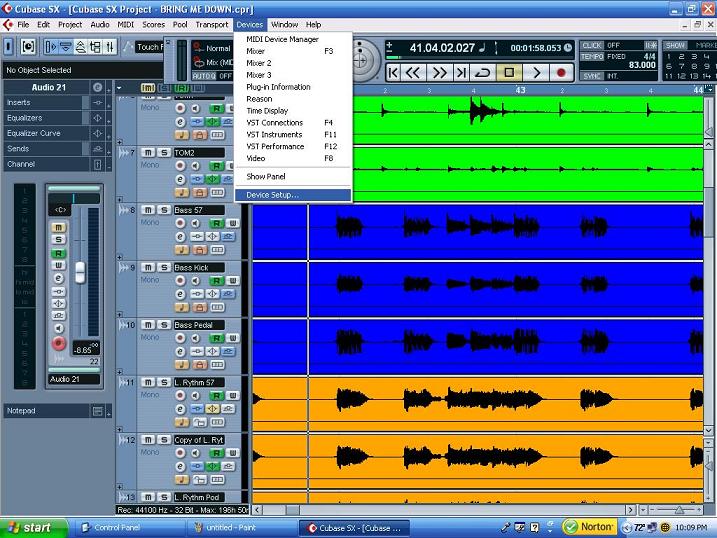
Click on Devices in the tool bar.
Select Device Setup.
- Step 3
Select VST Multitrack
Under Setup tab, select the M-Audio Delta ASIO Driver from the drop down menu.
The audio card is now configured to the recording software. Rock n' Roll!
