Dual Booting Ubuntu and Windows 7: Difference between revisions
No edit summary |
No edit summary |
||
| Line 9: | Line 9: | ||
NOTES: | NOTES: | ||
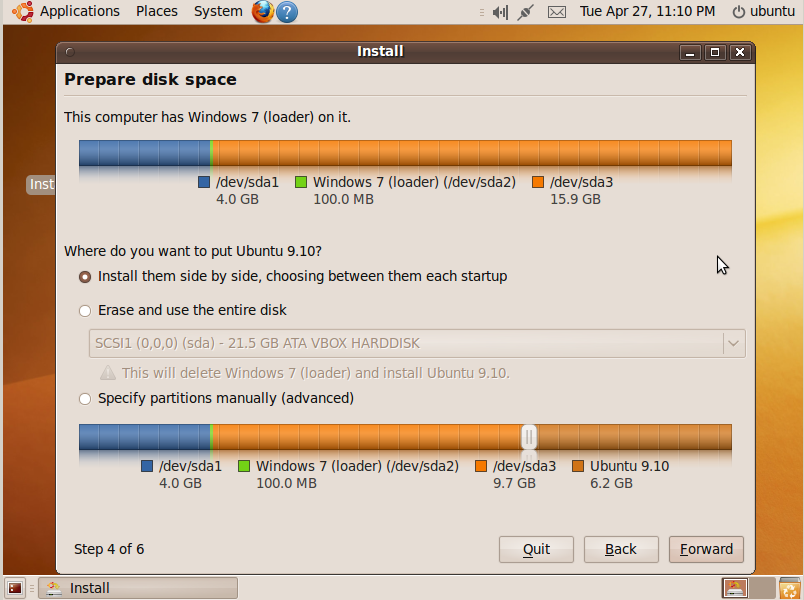
During the disk partitioner part make sure the Ubuntu install is going onto the right partition and not chopping up free space from your Windows partition. If you formatted the partition from step 2 then you will need to click the “specify partitions manually” radio button and make sure Ubuntu goes where you want it to by mounting / (root) in the right partition. | During the disk partitioner part make sure the Ubuntu install is going onto the right partition and not chopping up free space from your Windows partition. If you formatted the partition from step 2 then you will need to click the “specify partitions manually” radio button and make sure Ubuntu goes where you want it to by mounting / (root) in the right partition. | ||
[[File:Unbuntu_install1.PNG]] | |||
Depending on how much RAM your system has installed you may either opt to: | Depending on how much RAM your system has installed you may either opt to: | ||
Revision as of 00:27, 11 May 2010
1. Boot the Ubuntu live disc.
2. Use gparted to create a Linux partition
3. Install Windows 7
4. Install Ubuntu from the live CD installer link on the desktop.
NOTES: During the disk partitioner part make sure the Ubuntu install is going onto the right partition and not chopping up free space from your Windows partition. If you formatted the partition from step 2 then you will need to click the “specify partitions manually” radio button and make sure Ubuntu goes where you want it to by mounting / (root) in the right partition.
Depending on how much RAM your system has installed you may either opt to:
-create a swap partition
-create a swap file Swap File Help
Complete the install. Grub will automatically place a link to your windows boot loader in its boot menu.
