IPv6 Over IPv4 Tunnel
Written and Illistrated by Clay Wilson & Curt Hermanson
Before You Start
IPv6 is the up-and-comming, hotshot of the virtual world we have become so fond of, the internet. Destined to rule networks of all shapes and sizes, the new internet protocol will surely do its part in adding address space for people all across the world. Along with the other benefits of the change to IPv6, there are also some unavoidable difficulties (see Intro to IPv6 for a detailed introduction to the new protocol). When websites, and comanies, and end users alike begin to switch from using IPv4 to IPv6, difficulties may arise. One sollution is to use dual stack technology which allows devices to run both IPv4 and IPv6 cooperatively. Another approach is using a technique called tunnelling. Tunneling is a way to use one network protocol to encapsulate a different payload protocol, such as IPv6 (acting as the delivery protocol), and IPv4 (the payload protocol). In this example, IPv6 is going to be tunneled over a network (the internet) that is using IPv4. Given the name IPv6 over IPv4, or simply, 6over4.
The following is a detailed step-by-step guide written for home users who are interested in establishing a secure 6over4 tunnel using the http://www.tunnelbroker.net as the tunnel server provider.
What You Need
Before you begin, be sure your system is IPv6 ready, and you are comfortable with the task at hand.
- Computer with accessible connection to the internet.
- Windows Vista or newer OS.
- Administrator privilages to command prompt.
- Access to your home router configuration page.
- Create an account on tunnelbroker.net
Establishing an IPv6 Tunnel Over an IPv4 Internetwork
Join the Hurricane Electric online community
- In your web browser enter the url: http://www.tunnelbroker.net
- Create a username and password, and finish registration.
Creating a tunnel
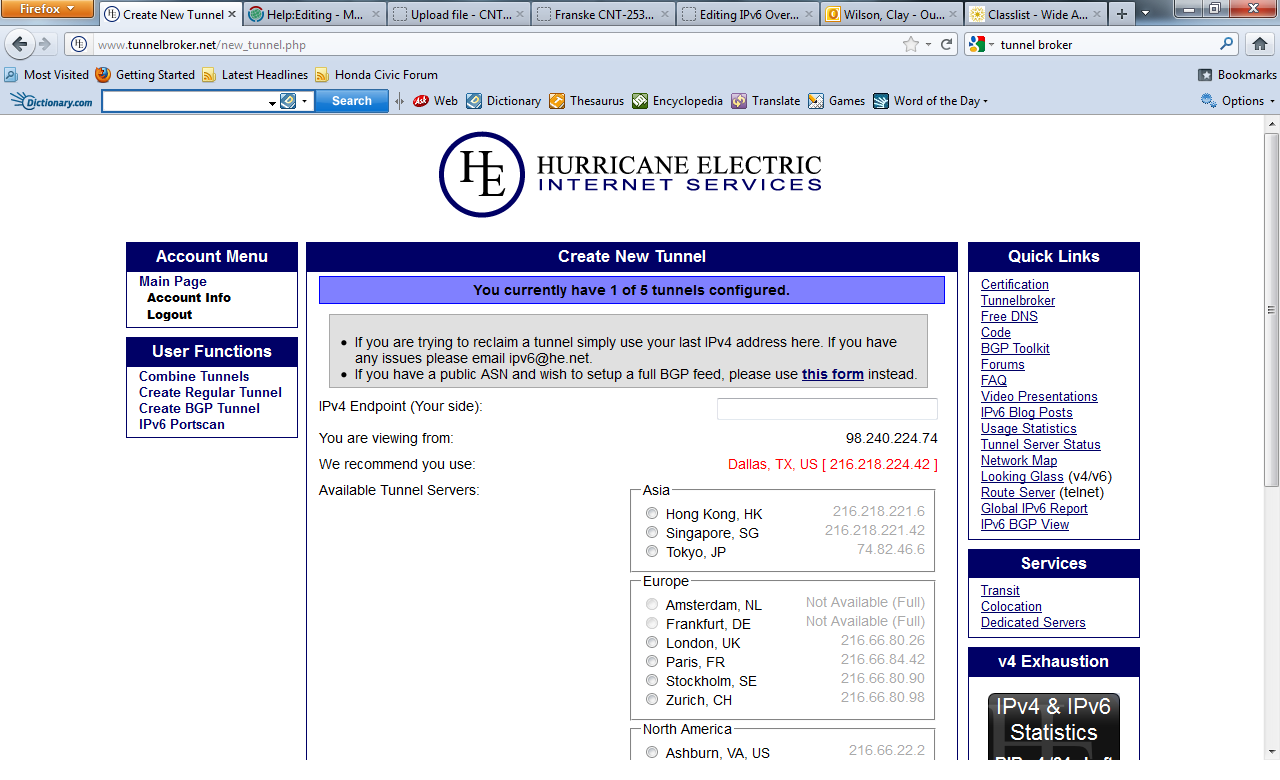
- Under User Functions, click Create Regular Tunnel.
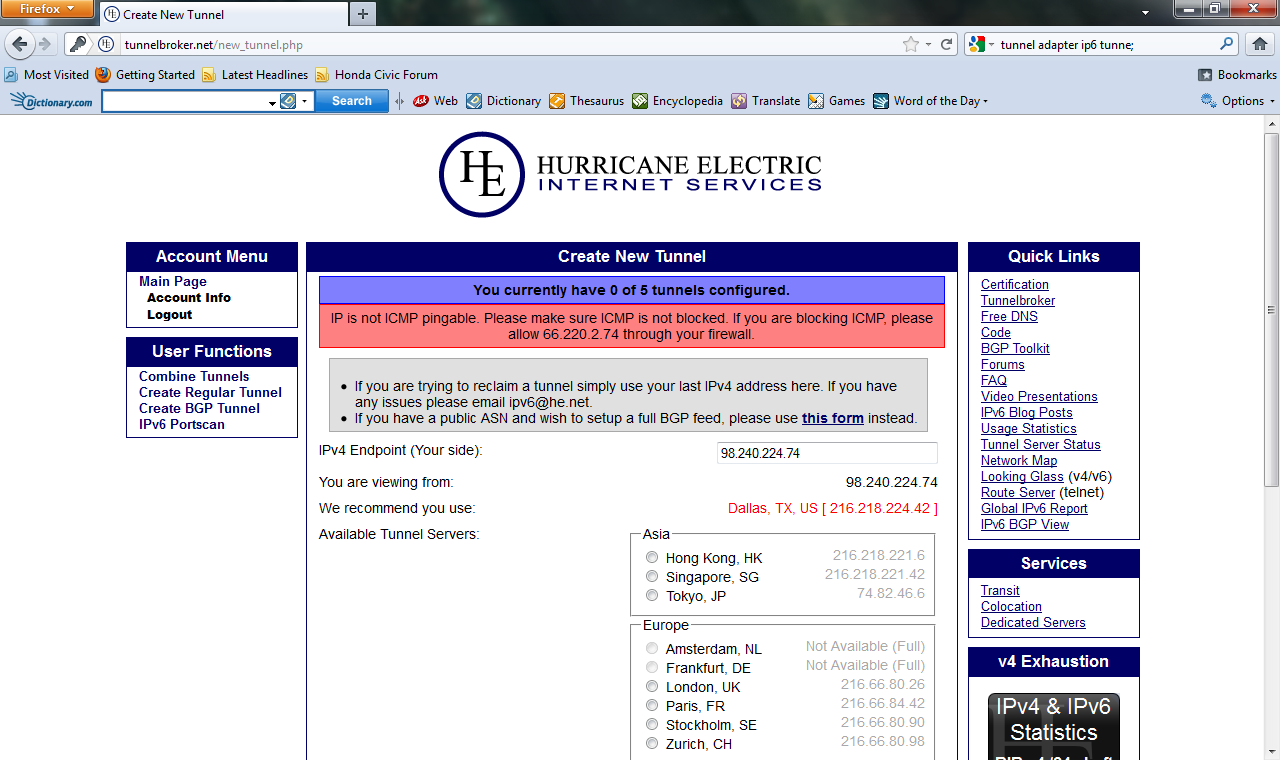
- The Create New Tunnel page loads. From here tunnel broker asks you for your IPv4 endpoint (your side). Notice below it shows the IP address you
are viewing from, You are viewing from: x.x.x.x. Choose the recommended tunneling server. Input your local IP address in the text box
asking for your IPv4 endpoint. You can find your local IP by visiting the domain, http://www.whatsmyip.org.
- If you recieve an error message that says IP is not ICMP pingable, you then have to go into your router configuration page (usually 192.168.0.1 or
a similar address), under WAN Connection Settings, and enable respond to pings on internet port. See the figure for additional help.
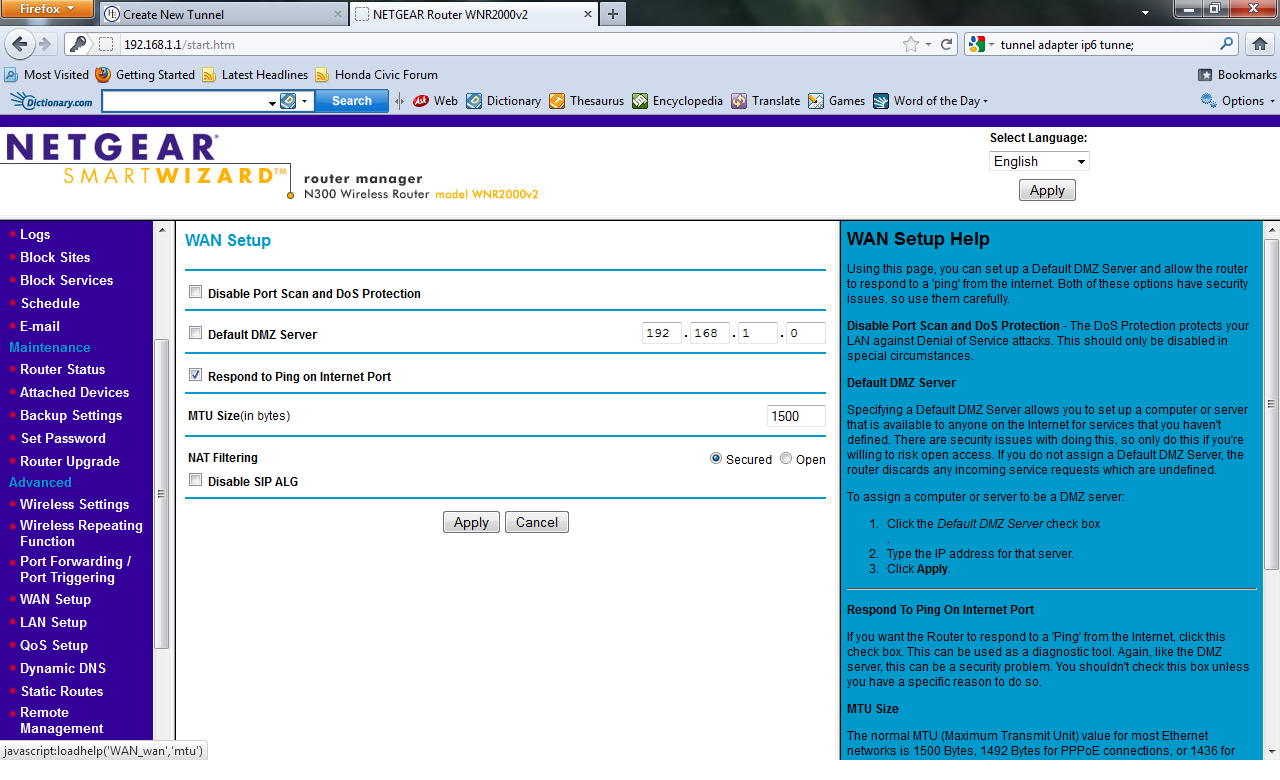
- Once you have allowed pings to respond on the internet port, you should have no trouble finishing the tunnel creation process. However, problems
may arise, and if you find yourself with an unexpected issue, troubleshoot as necessary. Use the tunnelbroker forum section, and search engines such
as google to find any helpful information when troubleshooting your tunnel.
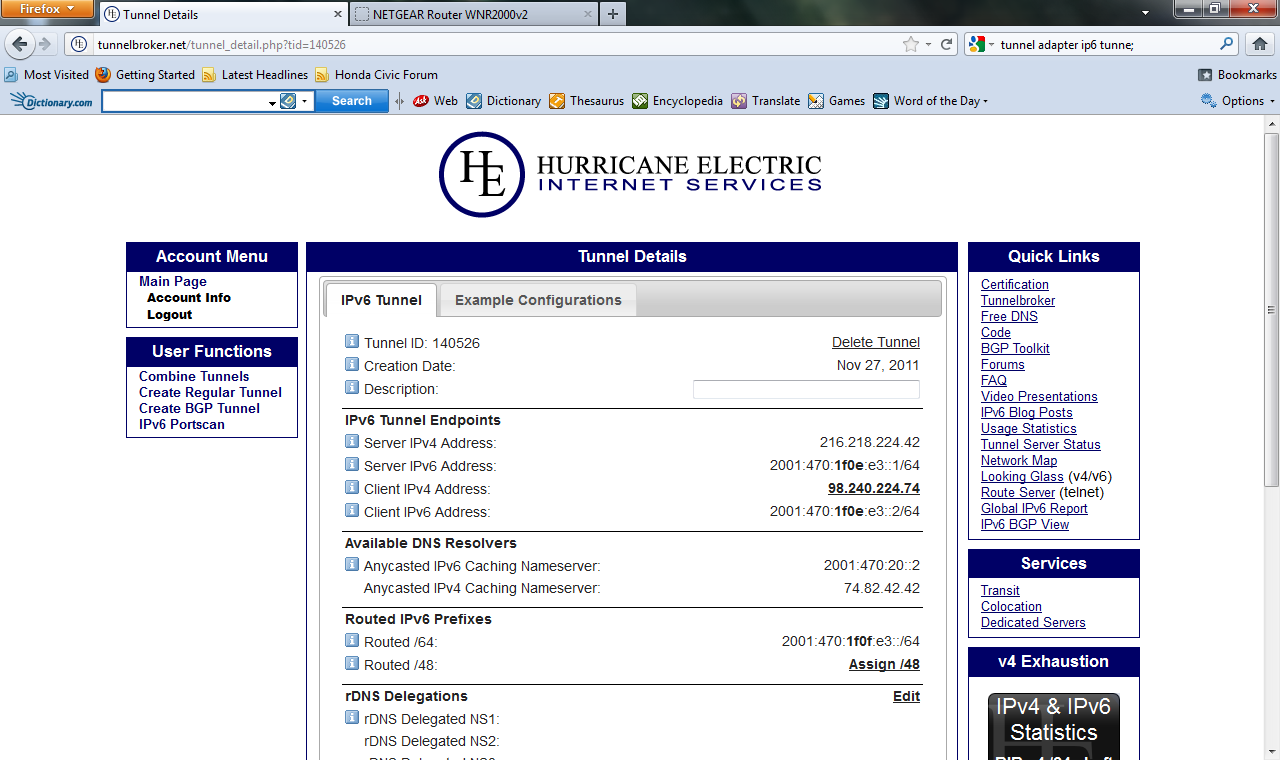
- Now that your tunnel is successfully created, you should be at the Tunnel Details page. This page shows a variety of information including: Tunnel ID,
IPv6 Tunnel Endpoints, Available DNS Resolvers, Routed IPv6 prefixes, etc.
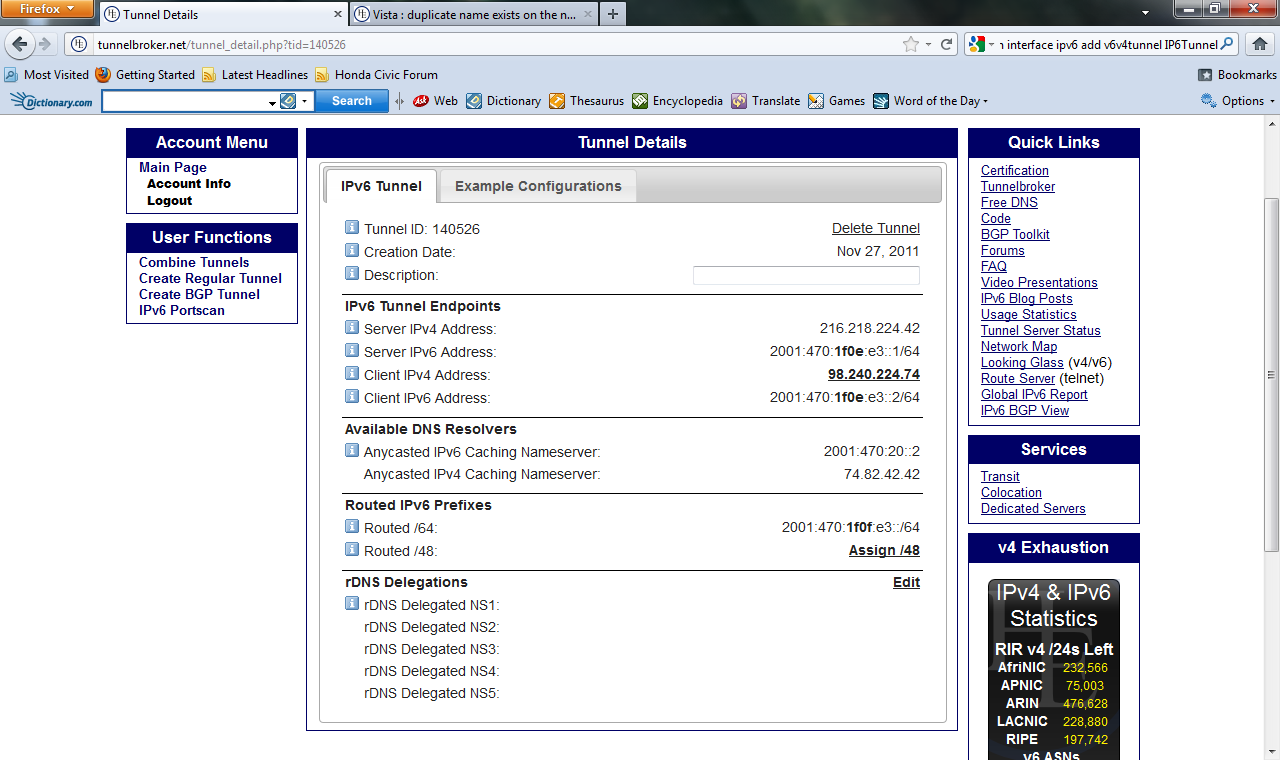
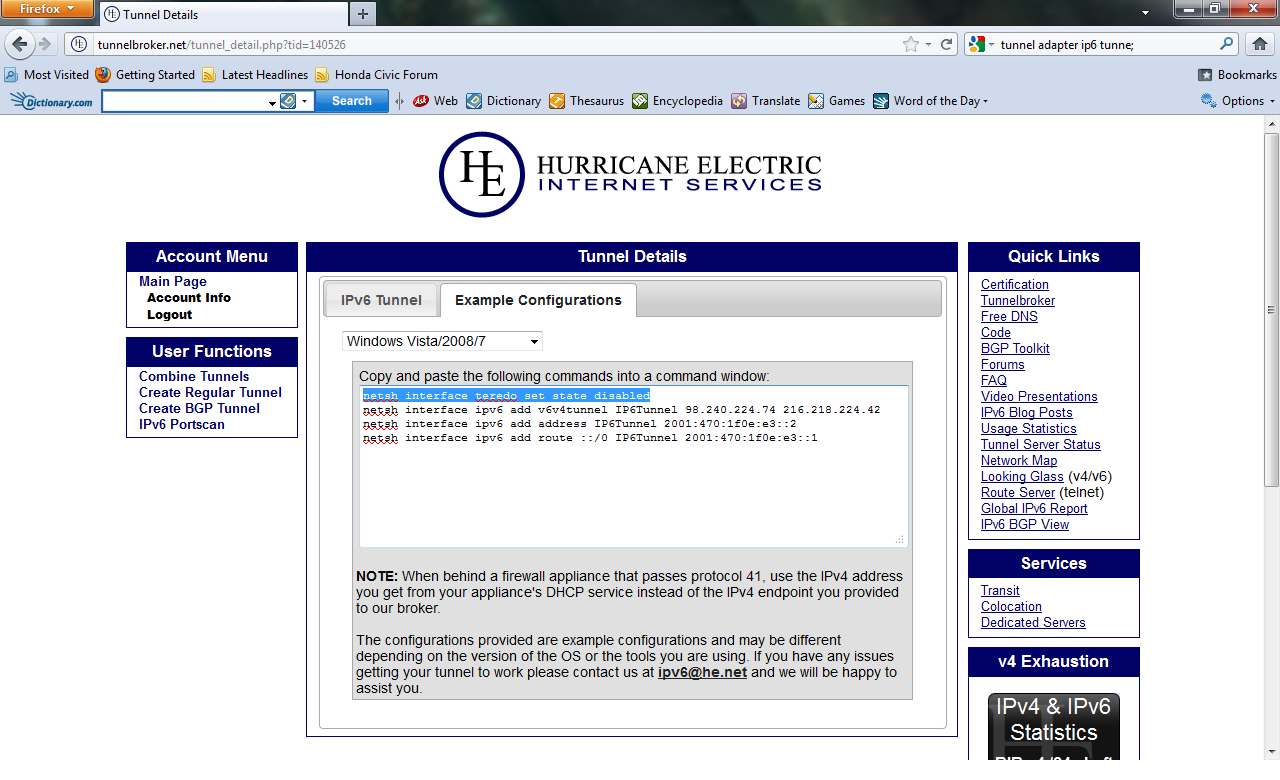
- Click the Example Configurations tab near the top of the page. This page displays the commands appropriate to your operating system that are
vital to the completion of configuring your 6over4 tunnel.
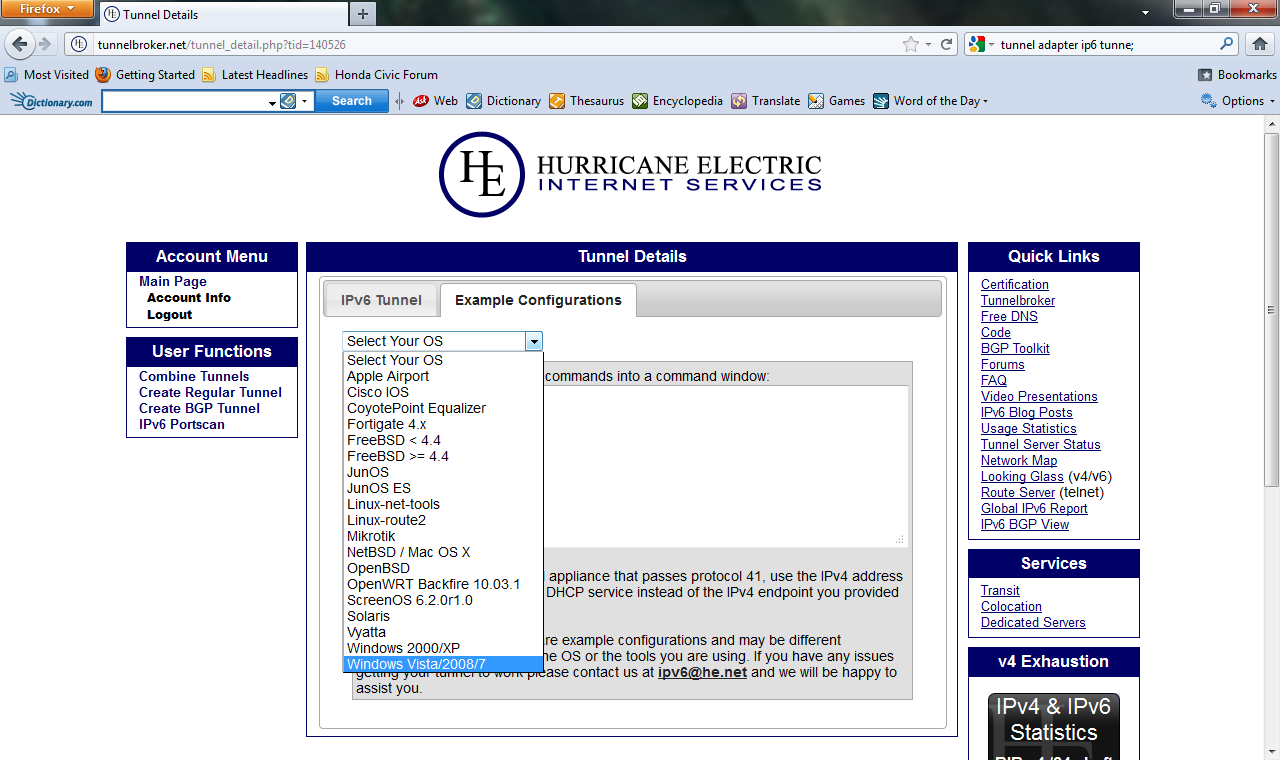
- Select your operating system from the pull down menu. NOTICE: This guide is aimed at configuring a tunnel using Windows operating system no older
- Now you should have four commands in the Example Configurations box.
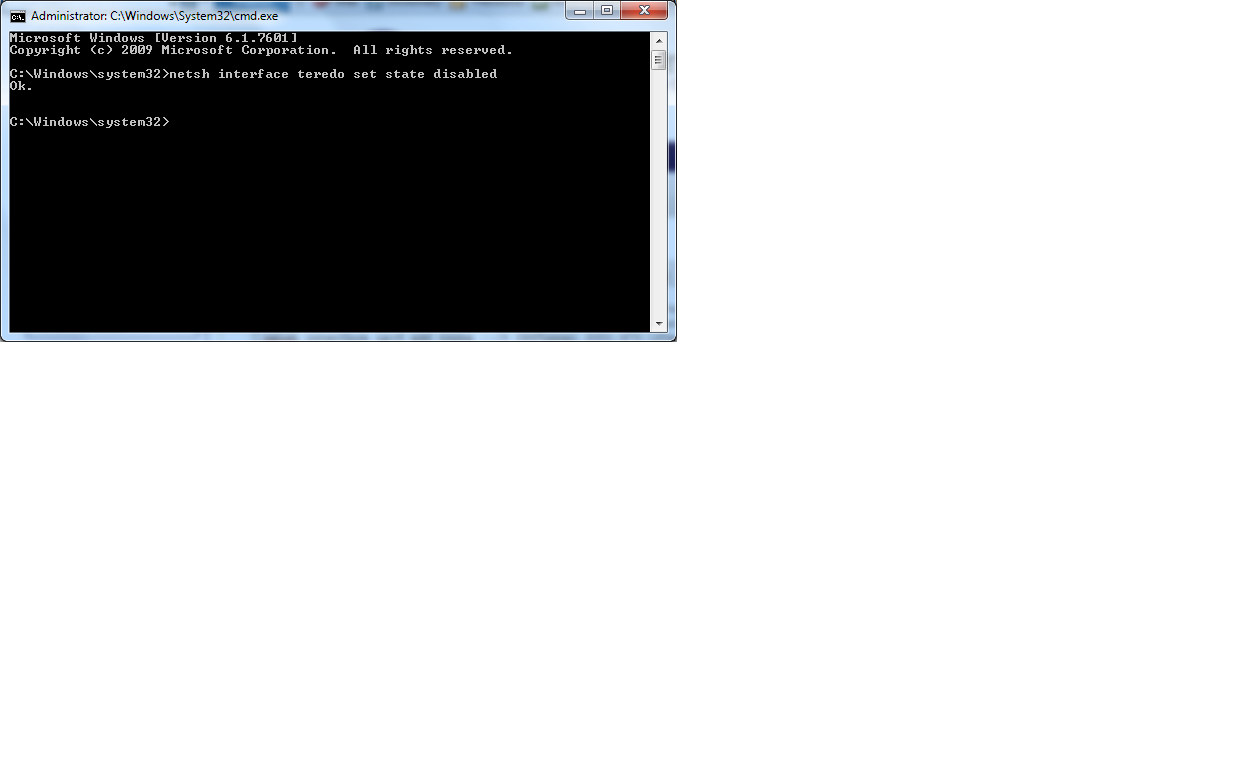
- Go to Start > type 'cmd' > push enter > right click on 'cmd' listed under programs, and Run as administrator.
- Copy and paste the first line under the Example Configurations box into your cmd.
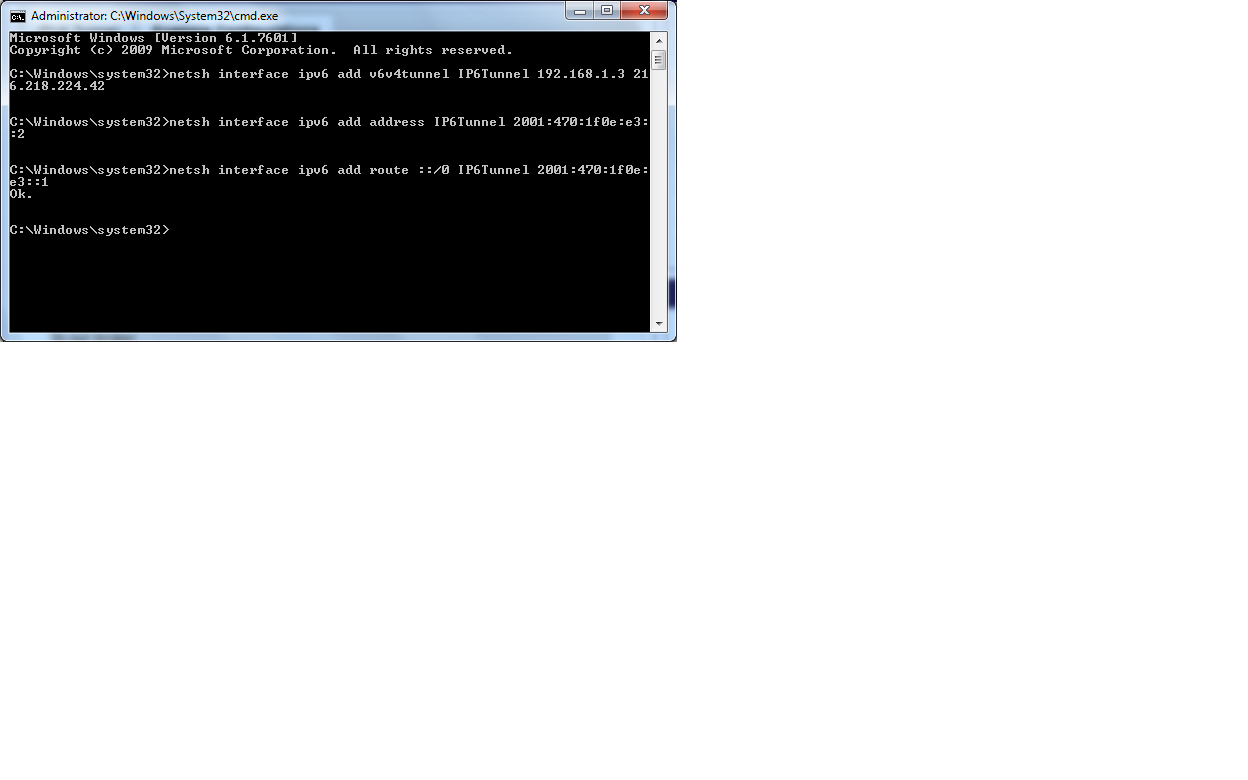
- Before you copy and paste the second line into your cmd, be sure to change the local IP address written in the provided command. Here's an
example of the command you should enter in your cmd. netsh interface ipv6 add v6v4tunnel ipv6tunnel <private ip address> 216.218.224.42
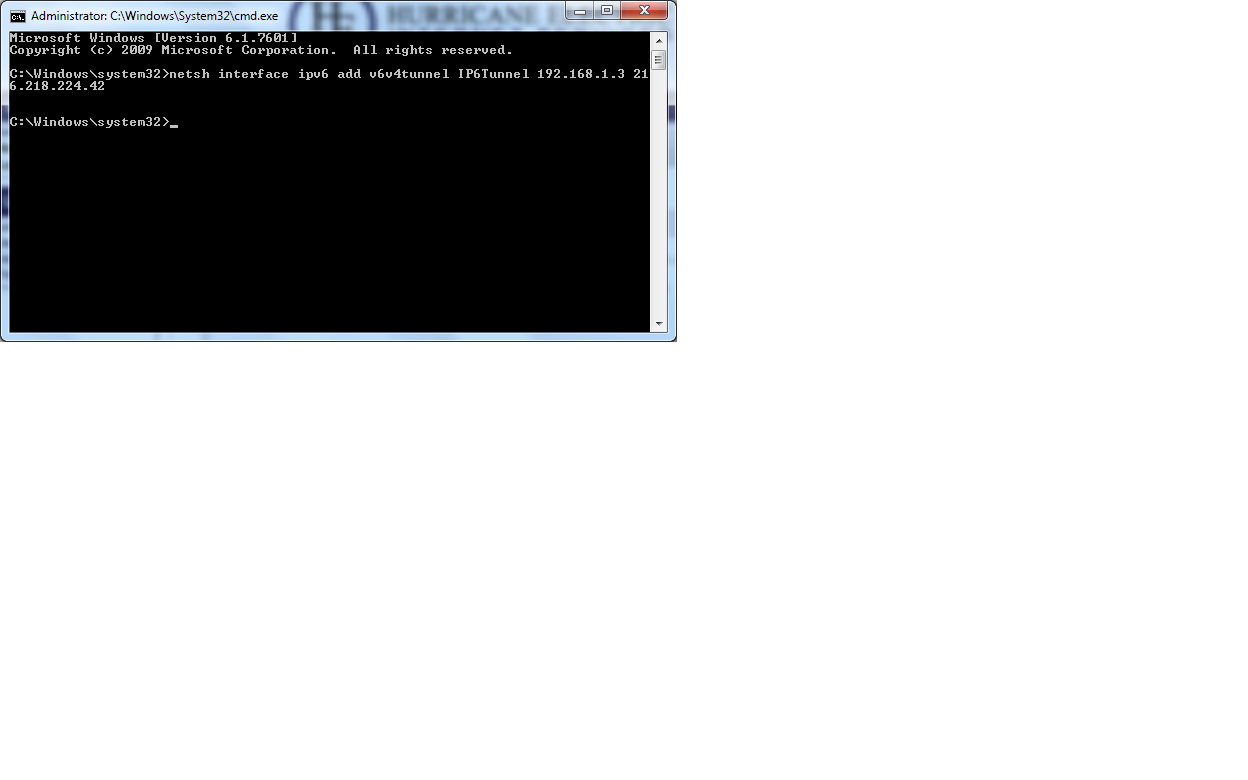
- Enter the next two lines seperately into your command prompt just as they are written. The following two commands will be an add address,
Once you have finished adding the four commands to your cmd, your IPv6 over IPv4 tunnel should be complete. If you experience any error messages troubleshoot as necessary. Be sure to copy and paste one command at a time, pasting multiple lines will not get you the desired results.
Testing your Tunnel
Now that you have established a 6over4 tunnel to the tunnelbroker tunneling server, you are ready to test your tunnel. A series of tests will verify whether or not your tunnel has been configured and established successfully.
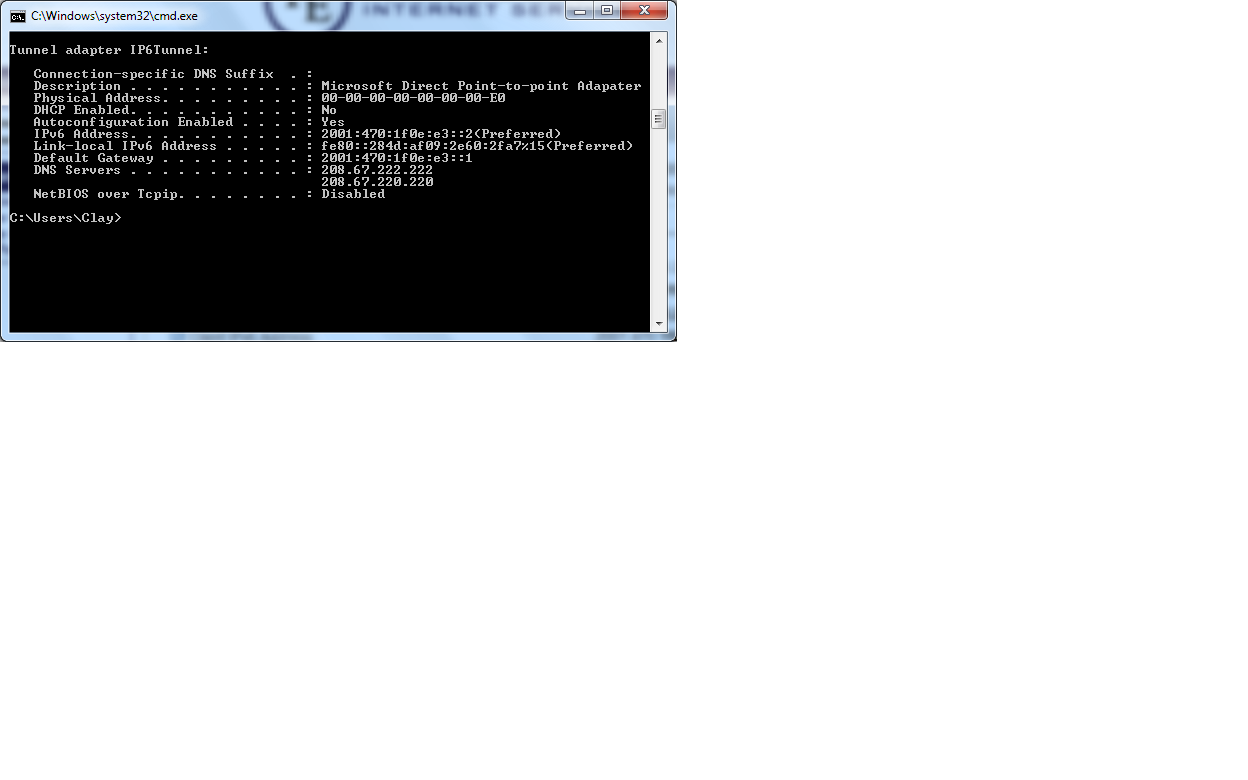
- Enter your cmd, and issue the ipconfig /all command.
- You should see an adapter named Tunnel Adapter IP6tunnel and be able to see the different IPv6 addresses associated with that adapter.
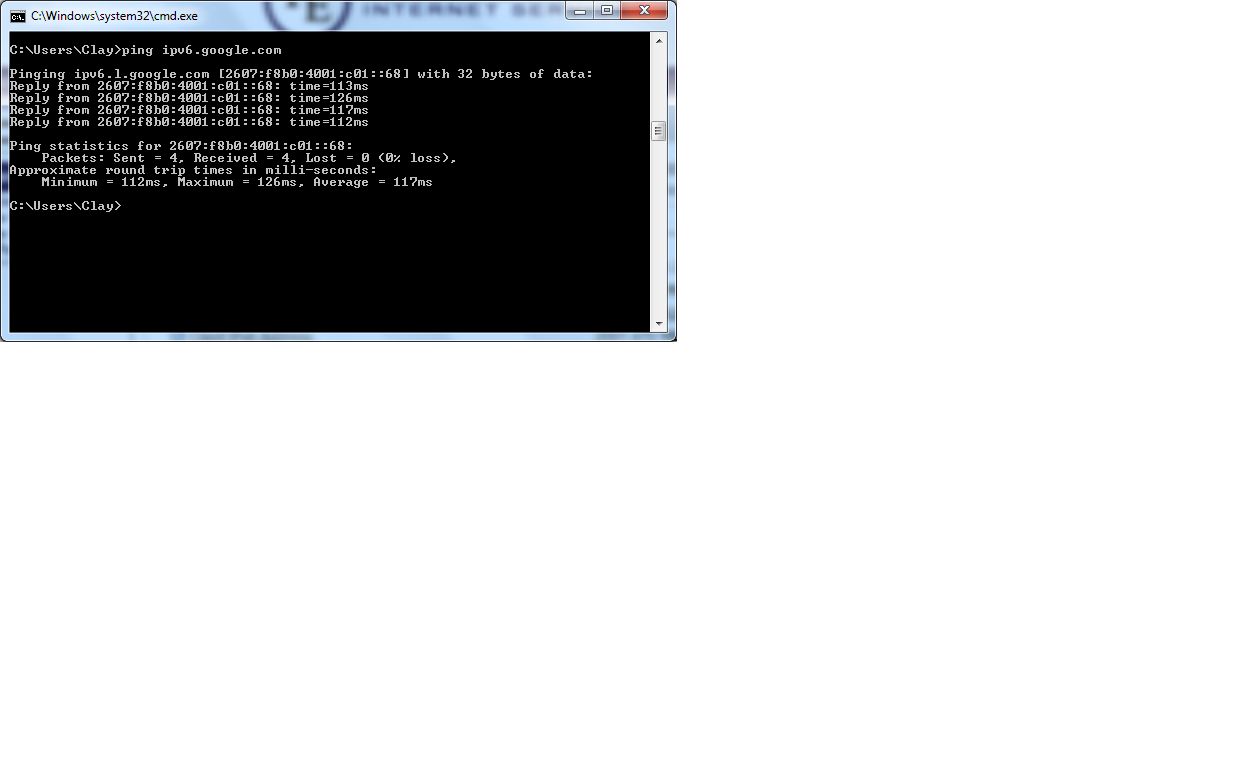
- Issue a ping to the domain ipv6.google.com
- Pinging an ipv6 address such as the google one listed above will verify that you are able to communicate successfully with an ipv6 server.
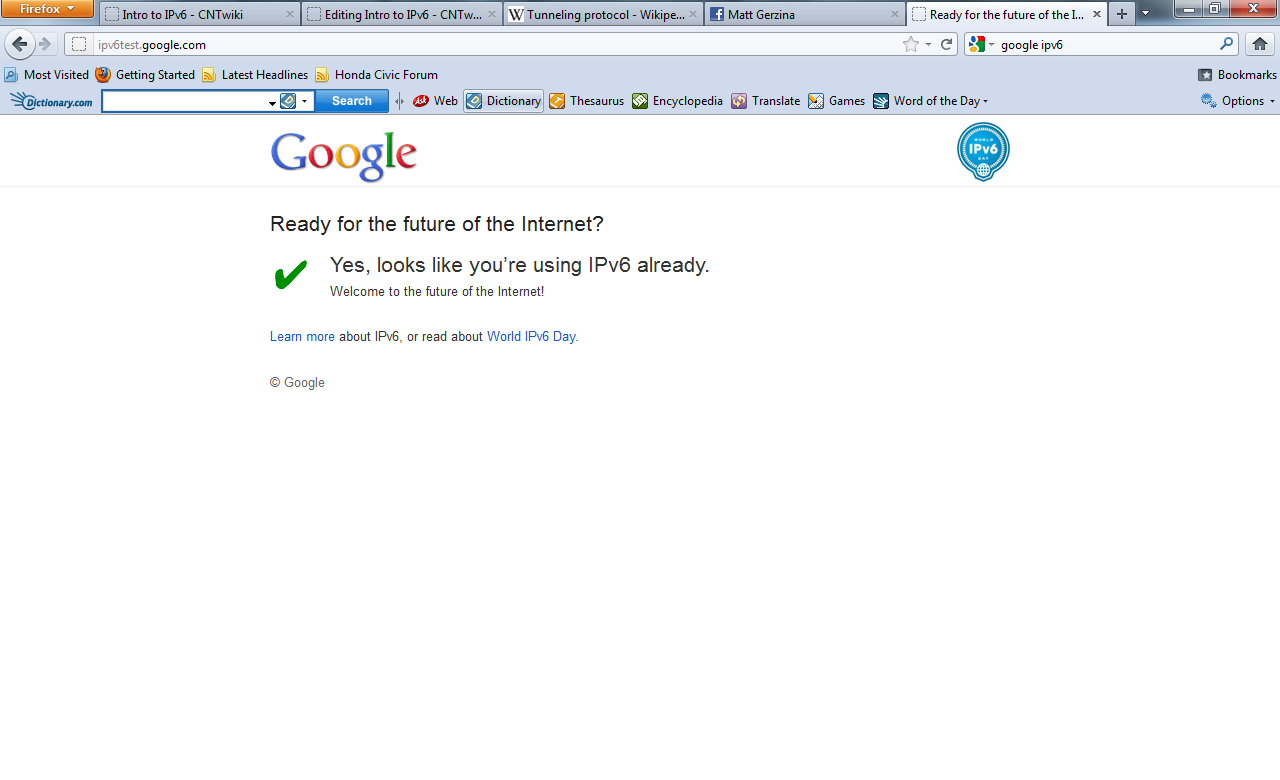
- The last test you can complete uses your web browser. Simply type in http://www.ipv6test.google.com. Much like test number 2, this varifies that
