Cracking WEP
Jump to navigation
Jump to search
- In this lab, I will show you how to crack WEP using BackTrack 3. As you may know, WEP is a week security protocol that can be broken easily. There are dozens of articles about cracking WEP on the internet, so if this article doesn’t give you enough information, please do some online researches. The purpose of this lab is not encouraged you to be a hacker. I set this lab for educational purpose and to prove that WEP is a weak protocol that can be hacked easily.
Hardware required
Here is a list of equipment and hardware Requirement for this lab:
- A wireless router - this could be any wireless router that supported WEP security encryption.
- A BackTrack 3 Live CD
- 2 wireless adapters - one of them should be a compatible wireless adapter.
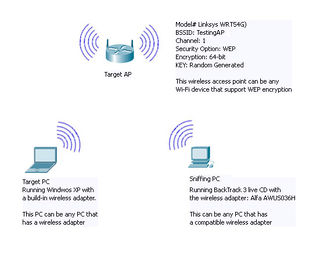
- At least 2 PCs – In this lab, I used a desktop and a laptop. I installed the compatible wireless adapter card in the desktop, and the other laptop has a build-in wireless adapter.
Setup the Wireless Lab
- Bellow are the software and hardware I used to this lab.
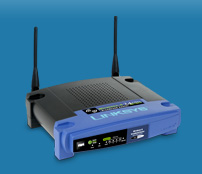
- The wireless router: I used the Linksys wireless router (WRT54G) as the wireless access point. I setup the wireless router as shown in the snapshot bellow.
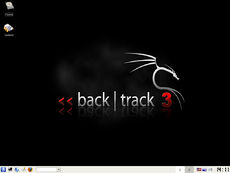
- The BackTrack 3 Live CD can be downloaded at http://www.backtrack-linux.org/downloads/. After the ISO image file has been downloaded, I burn it into a blank CD. If you would like instruction information of how to burn an ISO file to a CD/DVD, click on this link http://pcsupport.about.com/od/toolsofthetrade/ht/burnisofile.htm.
- Find a compatible wireless adapter from http://www.aircrack-ng.org/doku.php?id=compatibility_drivers#compatibility. Find one and buy it or use the one that you have. The wireless adapter I used in this lab was the Alfa AWUS036H. I bought it online for $29.
- I inserted the Alfa AWUS036H wireless adapter into an USB port on my desktop and insert the BackTrack 3 Live CD into the CD ROM. I called this desktop the “Sniffing PC.” Boot the Sniffing PC from the CD.
- I made sure that the laptop (the Target PC) and the wireless router WRT54G (the Target AP) are configured and communicated with each other correctly.
Capturing Packets
- Follow the steps bellow to setup and capture packets using BackTrack 3.
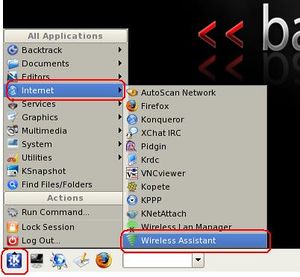
- On the Sniffing PC that is running BackTrack 3, select the small K icon located on the lower left hand corner. Select Internet and then click on Wireless Assistant.
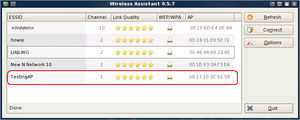
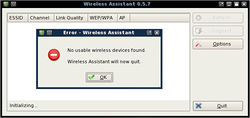
- When the Wireless Assistant window appear, you should see the target wireless access point that you want to hack. If you don’t have a compatible wireless adapter, it will prompt you an error massage says “No usable wireless device found.”
- Take note some of the information such as the BSSID, the channel number, and the MAC address of the wireless access point that you want to crack. In this lab, the SSID is Testing AR on channel 1, and MAC address is 00:13:10:3C:51:5B. When you done, close the Wireless Assistant window.
- Run Shell – Konsole window. It is a small black screen icon located on the lower left hand corner next to the small K icon.
- Enter the command bellow to find the adapter name. Once the name of your wireless adapter shown, take note of the interface name. Mine is wlan0.
airmon-ng
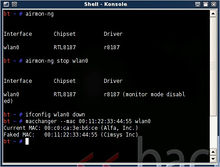
- Enter the 4 commands bellow by typing each command and press Enter key.
airmon-ng stop (your device Interface)
ifconfig (your device Interface) down
macchanger --mac 00:11:22:33:44:55 (your device Interface)
airmon-ng start (your device Interface)
- The purpose of these commands is to change the MAC Address of your wireless adapter to a faked MAC Address: 00:11:22:33:44:55.
- All the result of the commands above should look like the screenshot on the right.
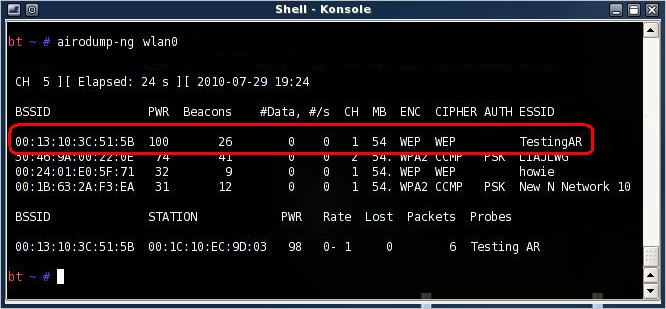
- Run the command bellow to pick up your device and see a list of the wireless access points around you. Once you see the Target AP, press Ctrl+C to stop scanning. On the list, you will see information such as the MAC Address (BBSSID), power level, channel, encryption protocol, and the name (ESSID) of each device. Write down this information of the wireless access point that you are going to hack for later use. The Target AP used in this lab is the highlighted in the snapshot bellow.
airodump-ng (your device Interface)
- Run the command bellow.
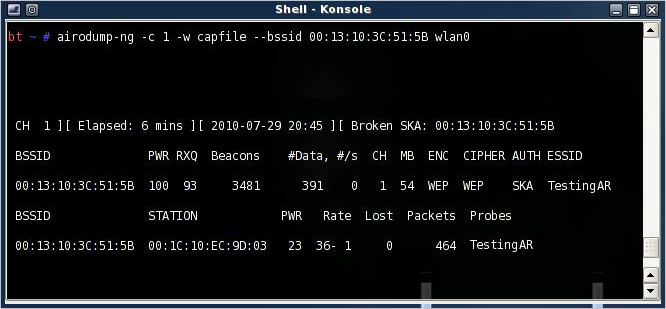
airodump-ng -c (channel) -w (file name) --bssid (bssid) (your device interface)
- The channel, bssid, and your device interface is the information that you noted above. The file name can be any name you want. This command will capture the packets traffic between the Target AP and any wireless client, and save them in a file. The command I used and the output is shown bellow.
- Now, I will use the second laptop (the Target PC) to watch some movies online on abc.com to generate more traffic between the Target AP and Target PC. Remember that the more packets traffic to the wireless access point, the more data you can capture, and the more likely you will successfully crack the key faster.
- Open a new Shell – Konsole windows (the second Shell - Konsole) without closing the first Shell - Konsole window, and then enter the following command.
aireplay-ng -1 0 -a (bssid) -h 00:11:22:33:44:55 -e (essid) (your device interface).
