Admin instructions mail server
Jump to navigation
Jump to search
Mail Server Documentation
- Basic configuration of server should follow the standard class server, see lab 1
- Power on you Virtual machine
- Install Debian Linux
- Set the domain name to itc2480.campus.ihitc.net
- Create a new user account ping using the adduser program
adduser ping- Use the links browser or wget to download the DEB package file from www.webmin.com
- NOTE: Because this DEB file was downloaded directly instead of automatically by APT from a package repository the installation command is slightly different and some other commands such as apt show will not work.
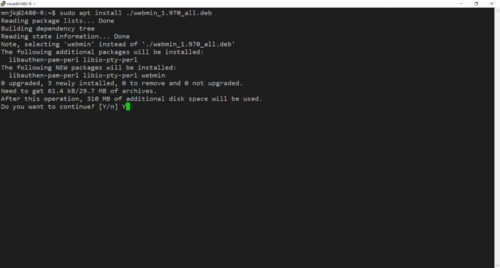
- Install the package with apt install
apt install ./<filename.deb>- Don't forget that installation of software must be done with system administrator permissions.

- Click for Larger Image
- Set a static IP for your server
- Apply your static IP address
Auto Reply Configuration
- Install vacation
- Vacation is a Linux package that will auto-respond to received emails for the receiving users.
- Run the vacation program in the profile you wish to set up the reply message from
- Follow the prompts, for now reply with the default answer (Y)
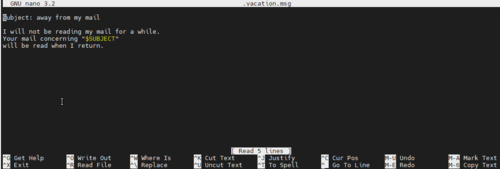
- Edit the vacation.msg file

- Click for a larger image
- Enter the message that you would like to have in the auto-response.
- Set the response to auto mail every message
- The default response is every one week to send an auto-reply, for our use it is important to reply to every email.
- NOTE: It is important to understand this command sets the auto-reply delay. Using the -r 0 sets the vacation program to reply to EVERY message it receives. In a production environment, this is not recommended as it can create mail loops.
- Test your reply message from the CLI mailutils package or the MTA chosen to use on client computers
sudo apt install vacation
vacation
nano vacation.msg
vacation -i -r 0
Auto Maildir Clean Up
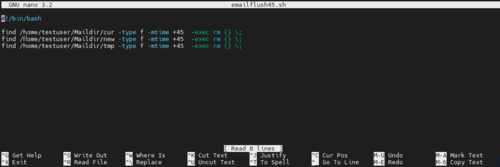
- Create script to delete emails older than 45 days
- NOTE: The script must be owned by root and executable. Additionally, the crontab must be created with sudo priviledges
sudo nano <scriptname.sh>- Make executable
sudo chmod +x <sciptname.sh>- Create a crontab job
sudo crontab -e- NOTE: the astricks at the start of the following command are respective to the scheduling of time. A good additional resource for cron can be found at Vitux. Each astrik represents [Minute] [hour] [Day_of_the_Month] [Month_of_the_Year] [Day_of_the_Week]
- Add the following line to the chrontab file to schedule the job at 8PM every day.
#!/bin/bash
find /home/testuser/Maildir/cur -type f -mtime +45  -exec rm {} \;
find /home/testuser/Maildir/new -type f -mtime +45  -exec rm {} \;
find /home/testuser/Maildir/tmp -type f -mtime +45  -exec rm {} \;
* 20 * * * * /home/ping/scriptname.sh

