Backup Windows 7 Activation: Difference between revisions
No edit summary |
No edit summary |
||
| Line 3: | Line 3: | ||
<h2 id="ly-proj" style="margin:3px; background:#C5DDFE; font-size:110%; font-weight:bold; border:1px solid #316CAB; text-align:left; color:#000; padding:0.2em 0.4em;">WHAT YOU NEED TO KNOW</h2> | <h2 id="ly-proj" style="margin:3px; background:#C5DDFE; font-size:110%; font-weight:bold; border:1px solid #316CAB; text-align:left; color:#000; padding:0.2em 0.4em;">WHAT YOU NEED TO KNOW</h2> | ||
In this article, | In this article, we will discuss mainly about how to backup and restore the activation files in Windows 7 64-Bit Operating System including Windows 7 32-Bit as well. | ||
There are three files that contain the activation information in Windows 7 64-Bit, the '''tokens.dat''' and two '''pkeyconfig.xrm-ms''' files. By default, the tokens.dat file located in ''C:\Windows\ServiceProfiles\NetworkService\AppData\Roaming\Microsoft\SoftwareProtectionPlatform\'' and the other two files, pkeyconfig.xrm-ms, are located in ''C:\Windows\System32\spp\tokens\pkeyconfig\'' and ''C:\Windows\SysWOW64\spp\tokens\pkeyconfig\''. Next two sections you will shown the commands needed to backup and restore these files. In order to be able to that, you need to have the Administrator right user account. | There are three files that contain the activation information in Windows 7 64-Bit, the '''tokens.dat''' and two '''pkeyconfig.xrm-ms''' files. By default, the tokens.dat file located in ''C:\Windows\ServiceProfiles\NetworkService\AppData\Roaming\Microsoft\SoftwareProtectionPlatform\'' and the other two files, pkeyconfig.xrm-ms, are located in ''C:\Windows\System32\spp\tokens\pkeyconfig\'' and ''C:\Windows\SysWOW64\spp\tokens\pkeyconfig\''. Next two sections you will shown the commands needed to backup and restore these files. In order to be able to that, you need to have the Administrator right user account. | ||
| Line 28: | Line 28: | ||
That's all what you need to backup the activation files of your Windows 7 64-Bit, so save this folder in a save place. When you reformat and reinstall your Windows 7 and you will need these backup files to reactivate your Windows. | That's all what you need to backup the activation files of your Windows 7 64-Bit, so save this folder in a save place. When you reformat and reinstall your Windows 7 and you will need these backup files to reactivate your Windows. | ||
<h2 id="ly-proj" style="margin:3px; background:#C5DDFE; font-size:110%; font-weight:bold; border:1px solid #316CAB; text-align:left; color:#000; padding:0.2em 0.4em;"> | <h2 id="ly-proj" style="margin:3px; background:#C5DDFE; font-size:110%; font-weight:bold; border:1px solid #316CAB; text-align:left; color:#000; padding:0.2em 0.4em;">REINSTALLING AND REACTIVATING WINDOW 7</h2> | ||
This section will give you the guideline to restore or reactivate Windows 7 64-Bit. | This section will give you the guideline to restore or reactivate Windows 7 64-Bit. | ||
'''NOTE''': When you reinstall Windows 7, do not enter the product key yet. When it prompted to enter the product key, just leave it black and click Next. Please remember that this guideline to activate your Windows will only work on the same machine that you have backup the activation files. It will not work on the same machine that has changed it's hardware or any other identical machines. | '''NOTE''': When you reinstall Windows 7, do not enter the product key yet. When it prompted to enter the product key, just leave it black and click Next. Please remember that this guideline to activate your Windows will only work on the same machine that you have backup the activation files. It will not work on the same machine that has changed it's hardware or any other identical machines. | ||
Latest revision as of 19:17, 15 October 2010
There are many ways to backup Windows 7 using third-party softwares. In this article, you will be shown how to backup and install only the activation files needed to reactivate Windows 7 when you reinstall your Windows 7 without connecting to the Internet and reactivate it. This way is beneficial because Microsoft lets you activate your Windows only ten times through the Internet. After ten times of activation, you may have to call Microsoft customer service to get the activation key. In the other word, backing up only the activation files takes less hard disk space than backing up the whole Operating System. In my experience, backing up and restoring the whole Operating System may be easier and takes less time to work. However, after restoring the operating System, it may not work well as you expect. This is because there were some errors or files corrupted during the backing up and restoring process. That is the reason why I am writing this article for.
WHAT YOU NEED TO KNOW
In this article, we will discuss mainly about how to backup and restore the activation files in Windows 7 64-Bit Operating System including Windows 7 32-Bit as well.
There are three files that contain the activation information in Windows 7 64-Bit, the tokens.dat and two pkeyconfig.xrm-ms files. By default, the tokens.dat file located in C:\Windows\ServiceProfiles\NetworkService\AppData\Roaming\Microsoft\SoftwareProtectionPlatform\ and the other two files, pkeyconfig.xrm-ms, are located in C:\Windows\System32\spp\tokens\pkeyconfig\ and C:\Windows\SysWOW64\spp\tokens\pkeyconfig\. Next two sections you will shown the commands needed to backup and restore these files. In order to be able to that, you need to have the Administrator right user account.
BACKING UP THE ACTIVATION FILES
In this section, we will create a bat file that contain the copy command to backup the activation files to a folder.
- First, create a folder in C:\ directory and name it Backup.
- Open Notepad and type or copy the following scrips into Notepad.
@echo off
copy %WinDir%\ServiceProfiles\NetworkService\AppData\Roaming\Microsoft\SoftwareProtectionPlatform\tokens.dat C:\Backup\
copy %WinDir%\System32\spp\tokens\pkeyconfig\pkeyconfig.xrm-ms C:\Backup\
copy %WinDir%\SysWOW64\spp\tokens\pkeyconfig\pkeyconfig.xrm-ms C:\Backup\pkeyconfig64.xrm-ms
pause
exit
NOTE: You don't need to include the fourth command line if you are using Windows 7 32-Bit.
- Press Ctrl+S keys to save the scripts in Notepad into C:\Backup folder. Name the file Backup.bat.
- Open the Backup folder, and right-click on the Backup.bat file, and then select Run as Administrator.
- Click Yes button when a small Windows prompted.
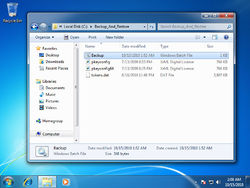
- Now you should see three more files added to the Backup folder.
That's all what you need to backup the activation files of your Windows 7 64-Bit, so save this folder in a save place. When you reformat and reinstall your Windows 7 and you will need these backup files to reactivate your Windows.
REINSTALLING AND REACTIVATING WINDOW 7
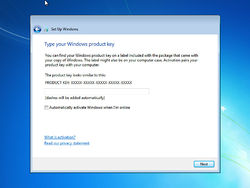
This section will give you the guideline to restore or reactivate Windows 7 64-Bit. NOTE: When you reinstall Windows 7, do not enter the product key yet. When it prompted to enter the product key, just leave it black and click Next. Please remember that this guideline to activate your Windows will only work on the same machine that you have backup the activation files. It will not work on the same machine that has changed it's hardware or any other identical machines. When your Windows 7 is installed and you need to reactivate it, follow these steps.
- Create a folder called Restore in C:\ directory.
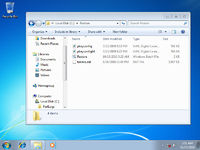
- Copy the three activation files that you have backed up, to the C:\Restore folder.
- Open Notepad and copy/past the following scripts into Notepad. Replace the XXXXX-XXXXX..... with your product key.
@echo off
net stop sppsvc /y
takeown /f "%WinDir%\System32\spp\tokens\pkeyconfig\pkeyconfig.xrm-ms"
takeown /f "%WinDir%\SysWOW64\spp\tokens\pkeyconfig\pkeyconfig.xrm-ms"
cacls "%WinDir%\ServiceProfiles\NetworkService\AppData\Roaming\Microsoft\SoftwareProtectionPlatform\tokens.dat" /e /g everyone:f
cacls "%WinDir%\System32\spp\tokens\pkeyconfig\pkeyconfig.xrm-ms" /e /g everyone:f
cacls "%WinDir%\SysWOW64\spp\tokens\pkeyconfig\pkeyconfig.xrm-ms" /e /g everyone:f
ren "%WinDir%\ServiceProfiles\NetworkService\AppData\Roaming\Microsoft\SoftwareProtectionPlatform\tokens.dat" "tokens.bak"
ren "%WinDir%\System32\spp\tokens\pkeyconfig\pkeyconfig.xrm-ms" "pkeyconfig.bak"
ren "%WinDir%\SysWOW64\spp\tokens\pkeyconfig\pkeyconfig.xrm-ms" "pkeyconfig.bak"
copy C:\Restore\tokens.dat "%WinDir%\ServiceProfiles\NetworkService\AppData\Roaming\Microsoft\SoftwareProtectionPlatform\"
copy C:\Restore\pkeyconfig.xrm-ms "%WinDir%\System32\spp\tokens\pkeyconfig\"
copy C:\Restore\pkeyconfig64.xrm-ms "%WinDir%\SysWOW64\spp\tokens\pkeyconfig\"
del "%WinDir%\ServiceProfiles\NetworkService\AppData\Roaming\Microsoft\SoftwareProtectionPlatform\tokens.bak"
del "%WinDir%\System32\spp\tokens\pkeyconfig\pkeyconfig.bak"
del "%WinDir%\SysWOW64\spp\tokens\pkeyconfig\pkeyconfig.bak"
net start sppsvc
cscript %windir%\system32\slmgr.vbs -ipk xxxxx-xxxxx-xxxxx-xxxxx-xxxxx
cscript %windir%\system32\slmgr.vbs -dlv
cscript %windir%\system32\slmgr.vbs -dli
cscript %windir%\system32\slmgr.vbs -ato
pause
exit
NOTE: if you are using Windows 7 32-Bit, you don't need to include the command line number 4, 7, 10, 13, 16 in Notepad.
- Save the scripts in Notepad into C:\Restore folder and name it Restore.bat.
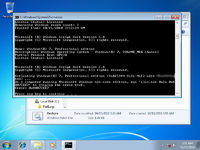
- Open C:\Restore folder and Right-click on Restore.bat file. Select Run as Administrator and then click Yes when it prompted.
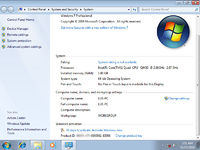
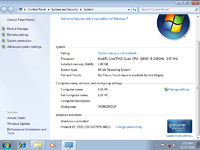
- Now your Windows should be activated and GENUINE.
THANK YOU FORE READING.
