Zoneminder: Difference between revisions
Jump to navigation
Jump to search
No edit summary |
No edit summary |
||
| Line 16: | Line 16: | ||
# You will also need to find the Device Format, Capture Palette, Capture Width, and Capture Hight from the cameras manufacturer. | # You will also need to find the Device Format, Capture Palette, Capture Width, and Capture Hight from the cameras manufacturer. | ||
# Click "Save" | # Click "Save" | ||
#* If everything is working you should see the camera monitor you just made in the list. If you click on it you can view the camera as jpegs. | |||
=Set up Streaming Video= | |||
Revision as of 15:45, 11 May 2010
ZoneMinder is a security camera program for Ubuntu. With it you can use your server as a security camera DVR that you can view online and record to the hard disk of the server. Make sure to plug in a USB webcam or similar device before you continue.
Install Zoneminder
- Use Aptitude to install ZoneMinder
- sudo aptitude install zoneminder
- Aptitude will ask you if you want to install a bunch of extra packages. Make sure to say yes to that.
Configure ZoneMinder from the web interface
- Find your IP address using the ifconfig command
- Go to a web browser and type ip-address/zm in the URL bar
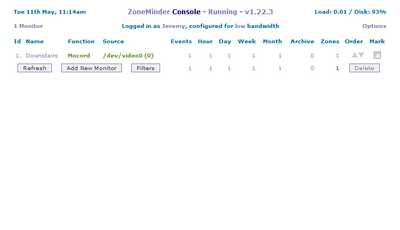
- You will then see the zoneminder console.
- Click on "Add New Monitor"
- Fill in the Name, Source Type, and Function. For now, just set the function to Monitor.
- Put in a Maximum FPS (frames per second). If you don't know what to put just type 15
- Put the same value as Max FPS into the Alarm Max FPS field.
- Click on the source tab on the top of the window.
- You will have to find the Device Path of your specific camera. Mine was /dev/video0. You could look in your syslog to find this.
- You will also need to find the Device Format, Capture Palette, Capture Width, and Capture Hight from the cameras manufacturer.
- Click "Save"
- If everything is working you should see the camera monitor you just made in the list. If you click on it you can view the camera as jpegs.
