LinksysRouterSetUp: Difference between revisions
Jump to navigation
Jump to search
by Stefanie Mayer
(the very first thing you should always do with any electrical trouble shooting is check the power.)
| Line 27: | Line 27: | ||
*Make sure that the computer is set to receive automatic addressing | *Make sure that the computer is set to receive automatic addressing | ||
**Start button -> Network Connections, right click Local Area Connection, -> Properties, scrolling down to the Internet Protocol (TCP/IP), -> properties, and on the General tab, select, obtain an IP address automatically. | **Start button -> Network Connections, right click Local Area Connection, -> Properties, scrolling down to the Internet Protocol (TCP/IP), -> properties, and on the General tab, select, obtain an IP address automatically. | ||
[[File:step_2.jpg|center]] | [[File:step_2.jpg|center]] | ||
| Line 41: | Line 42: | ||
[[File:linksys front led.jpg]] | [[File:linksys front led.jpg]] | ||
| Line 50: | Line 52: | ||
[[File:user name_password.jpg]] | [[File:user name_password.jpg]] | ||
*If this does not work, you will need to do a factory reset on the router. You can do this by pressing in the reset button for 30 seconds and then unplugging the power cord. When you power back up, the blank user name and password "admin" should get you in to the web-based Setup page. | *If this does not work, you will need to do a factory reset on the router. You can do this by pressing in the reset button for 30 seconds and then unplugging the power cord. When you power back up, the blank user name and password "admin" should get you in to the web-based Setup page. | ||
| Line 59: | Line 63: | ||
*Now go to the Wireless tab-> Wireless Security and in the Security Mode: chose WPA Personal | *Now go to the Wireless tab-> Wireless Security and in the Security Mode: chose WPA Personal | ||
*In the WPA Shared Key space, enter a secure password. (Be sure to write it down, as you will need this to connect other computers to the router.) Save Settings. | *In the WPA Shared Key space, enter a secure password. (Be sure to write it down, as you will need this to connect other computers to the router.) Save Settings. | ||
| Line 66: | Line 71: | ||
*Here you can change the name of you router as it appears on the network or, if you want it to show or not. | *Here you can change the name of you router as it appears on the network or, if you want it to show or not. | ||
*On the Network Name (SSID) | *On the Network Name (SSID) | ||
[[File:wireless basic ssid enabled.jpg]] | [[File:wireless basic ssid enabled.jpg]] | ||
| Line 73: | Line 80: | ||
*Go to the Administration tab -> Management | *Go to the Administration tab -> Management | ||
**Here, you can change the router's password for further protection | **Here, you can change the router's password for further protection | ||
Revision as of 01:21, 9 May 2010
How to Set Up and Secure the Linksys WRT300N Wireless N Router *
- 1. Verify internet connectivity
- First things first, go ahead and verify that you have internet connectivity, assuming that the computer has a network interface card (NIC). (Ethernet adapter)
- You won't be able to connect to the internet without it.
- Use a direct line (cable) to connect the modem to the computer.
- 2. Connect the router
- Once connection is established, plug the router into an AC power outlet.
- Connect the modem into the Internet port on the router (blue)
- Connect the computer to any of the remaining 4 Ethernet ports (yellow)
- These are labeled and color-coded on the back of the router so if you are not sure, check.
- When setting up a wireless router for the first time, the connection and setup must be prepared hardwired first. Once the setup is complete, you should be able to connect wireless.
- Make sure that the computer is set to receive automatic addressing
- Start button -> Network Connections, right click Local Area Connection, -> Properties, scrolling down to the Internet Protocol (TCP/IP), -> properties, and on the General tab, select, obtain an IP address automatically.
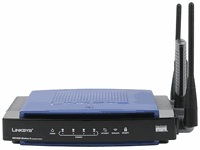
- 3. Check for green LEDs
- The routers LEDs are located on the front panel and the following should be lit:
- The Power LED
- NOTE: If the Power LED is blinking, you need to upgrade the router’s firmware.
- WLAN or Wireless LED. If this is not lit, reset the router.
- The Ethernet LED that the computer is plugged in to, either 1, 2, 3, or 4.
- The Internet or WAN LED
- We will check the security LED later
- 4. In a browser window
- Type in "http://192.168.1.1" (this is the default IP address)
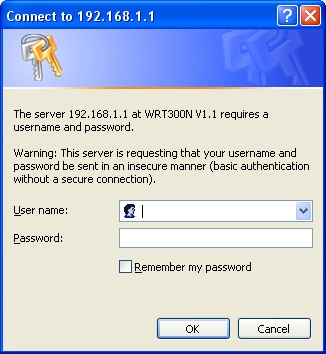
- Another window will open and prompt you for a user name and password
- The Linksys default username is left blank
- The default password is "admin"
- If this does not work, you will need to do a factory reset on the router. You can do this by pressing in the reset button for 30 seconds and then unplugging the power cord. When you power back up, the blank user name and password "admin" should get you in to the web-based Setup page.
- 5. Linksys web-based Setup page
- Click the Setup tab -> Basic Setup and make sure you're set to Automatic Configuration – DHCP. Save Settings.
- Now go to the Wireless tab-> Wireless Security and in the Security Mode: chose WPA Personal
- In the WPA Shared Key space, enter a secure password. (Be sure to write it down, as you will need this to connect other computers to the router.) Save Settings.
- 6. Change the Service Set IDentifier (SSID)
- SSID is associated with the 802.11 wireless LAN
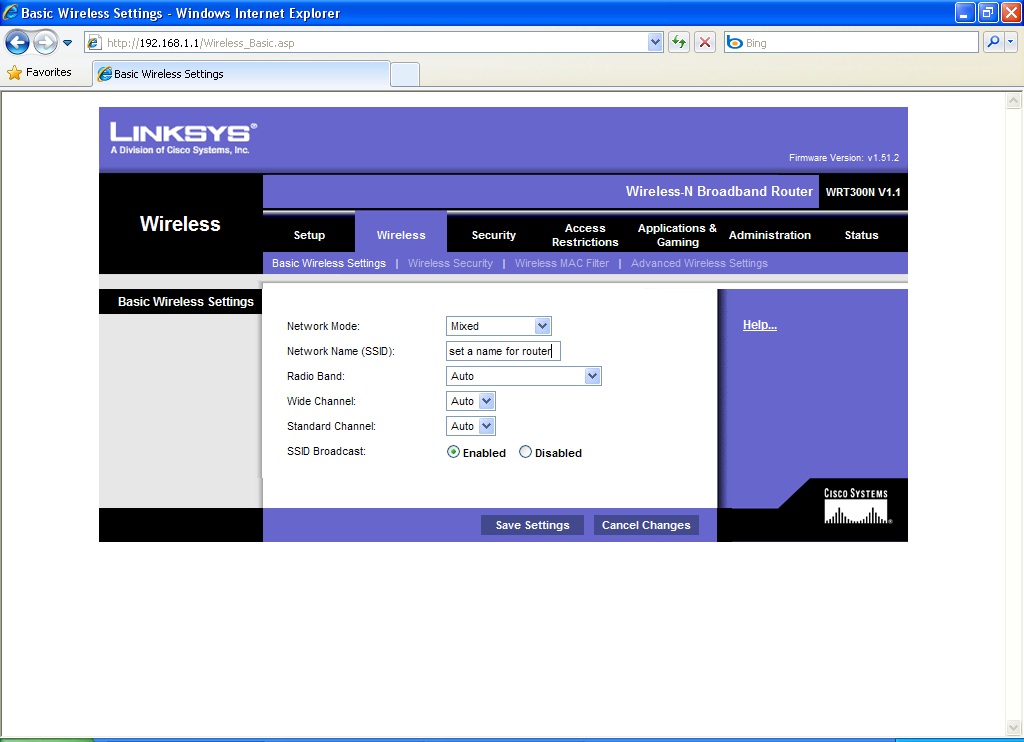
- Go to the Wireless tab -> Basic Wireless Settings
- Here you can change the name of you router as it appears on the network or, if you want it to show or not.
- On the Network Name (SSID)
- 7. Change the Router's Password
- Go to the Administration tab -> Management
- Here, you can change the router's password for further protection
YOU HAVE JUST SET UP A SECURE ROUTER CONNECTION!
If you have any problems during this set up you can refer to the manufacturers website [1]
->NOTE:This project is set up for use without the router’s setup CD


