Installing Webmin: Difference between revisions
(→Step 5) |
(→Step 2) |
||
| (6 intermediate revisions by the same user not shown) | |||
| Line 14: | Line 14: | ||
==Step 2== | ==Step 2== | ||
After downloading and installing the perl packages crucial for the operation of webmin, you will want install the webmin application itself, by using the "wget command | After downloading and installing the perl packages crucial for the operation of webmin, you will want install the webmin application itself, by using the "wget" command and the URL to the webmin package | ||
Note: Again you must have internet connectivity to download the package via 'wget' | |||
[[File:wget.jpg]] | [[File:wget.jpg]] | ||
| Line 44: | Line 46: | ||
[[File:firefox.jpg]] | [[File:firefox.jpg]] | ||
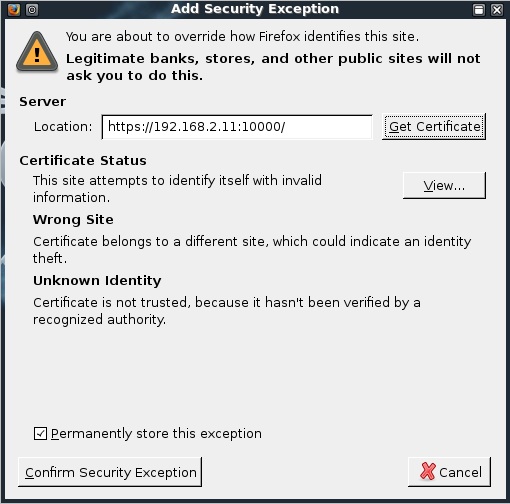
Then you want to click 'get certificate' and finally click 'confirm security exception' | |||
[[File:firefox security exception.jpg]] | |||
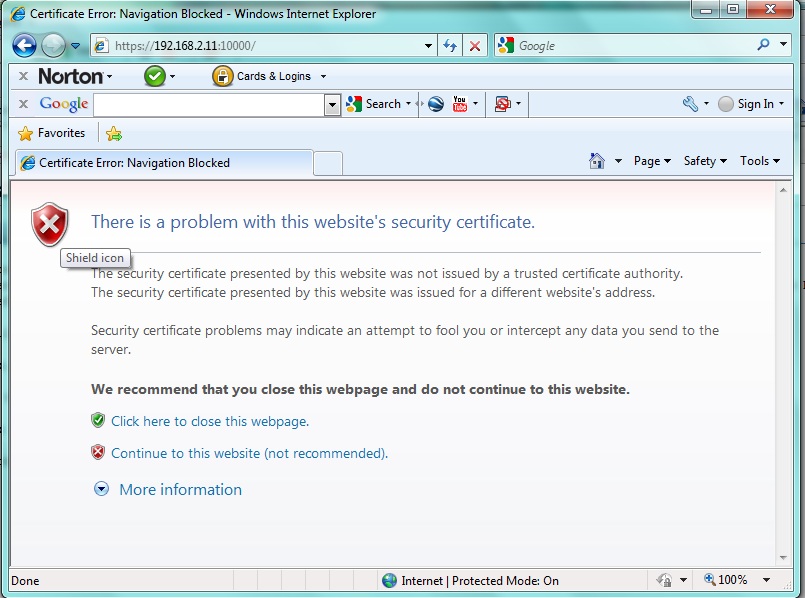
If using Internet explorer click 'continue to this website' | |||
[[File:internet explorer.jpg]] | |||
==Step 6== | |||
When at the webmin login screen log in as your root account with the same password just as you would from the command line on your server | |||
[[File:webmin login.jpg]] | |||
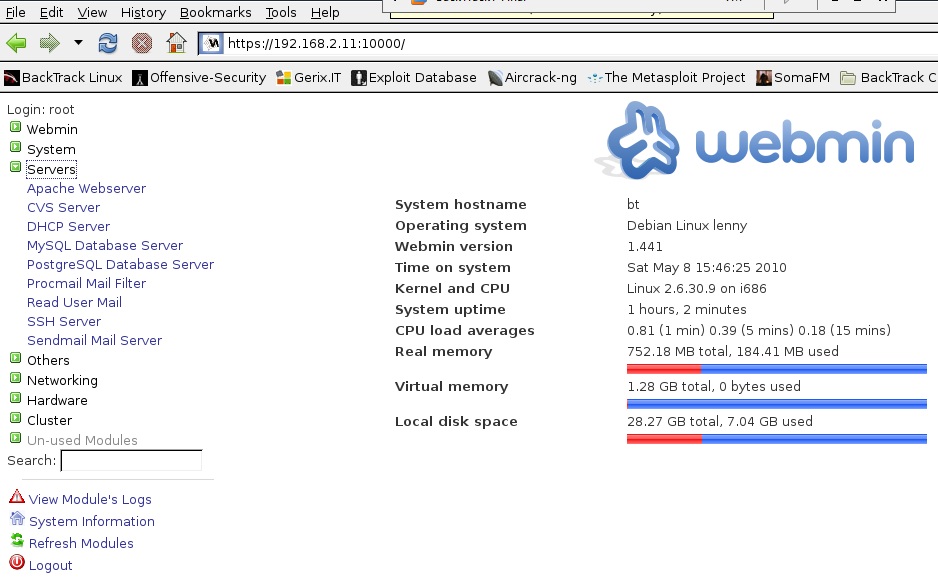
Now that you are logged in you are ready to administer your linux server via webmin through your web browser! | |||
[[File:webmin.jpg]] | |||
Click 'Refresh Modules' in the lower left-hand corner to load all your servers such as apache, MySQL, Sendmail Mailserver, DHCP Server, Bind9, etc. | |||
Latest revision as of 20:06, 8 May 2010
Webmin is a GUI-based tool for administrating your linux server from a web browser with ease
Step 1
The first thing you'll want to do is download and install the perl packages using the "aptitude install" command
Note: You must have internet connectivity to run the "aptitude install" command and also must run it "sudo" if you aren't logged in as a root account. Example: "sudo aptitude install" then you will be prompted for a root password
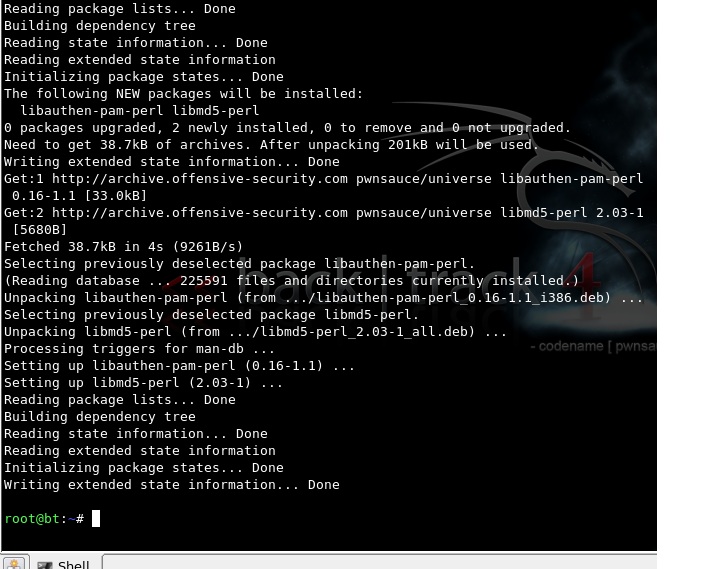
After hitting enter to initiate the installs, it should look something like this:
Step 2
After downloading and installing the perl packages crucial for the operation of webmin, you will want install the webmin application itself, by using the "wget" command and the URL to the webmin package
Note: Again you must have internet connectivity to download the package via 'wget'
The download process should look similar to this:
Step 3
After downloading the webmin package, you will want to install it using the "dpkg" command with a "-i" which installs the package file
Note: The "dpkg" command also must be run with root privileges
Step 4
Now you are ready to use webmin! Now all you need to do is check your ip address with the "ifconfig" command
This shows that my current ip address is 192.168.2.11, your ip will most likely be different
Step 5
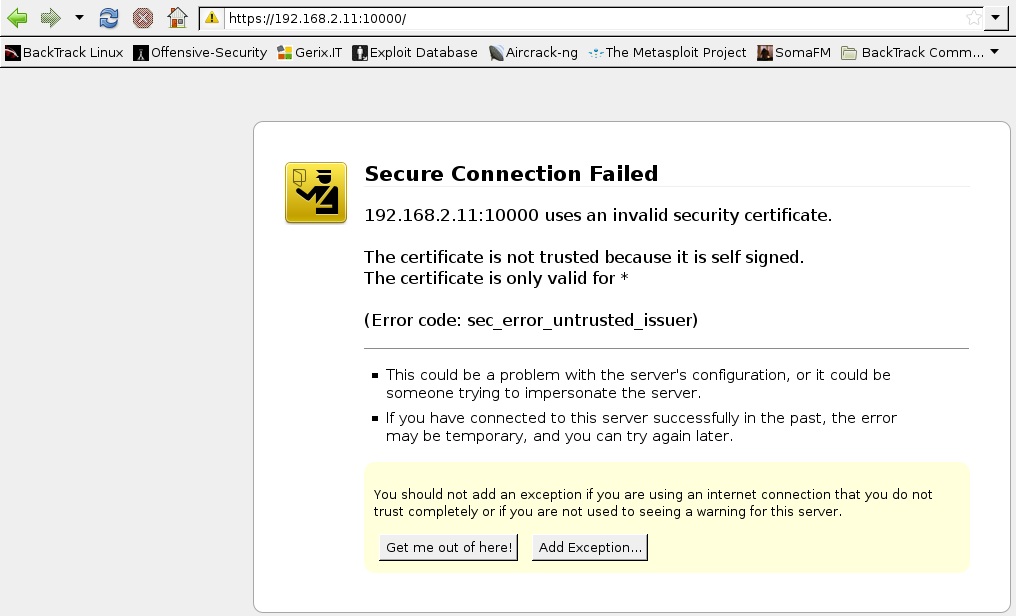
Open a web browser and type "https://192.168.2.11:10000" Note: Keep everything the same but substitute your ip address with the one I used, you must have the 's' in https because it uses SSL, and by default webmin runs on port 10000
If using Mozilla Firefox click 'add exception' for the certificate
Then you want to click 'get certificate' and finally click 'confirm security exception'
If using Internet explorer click 'continue to this website'
Step 6
When at the webmin login screen log in as your root account with the same password just as you would from the command line on your server
Now that you are logged in you are ready to administer your linux server via webmin through your web browser!
Click 'Refresh Modules' in the lower left-hand corner to load all your servers such as apache, MySQL, Sendmail Mailserver, DHCP Server, Bind9, etc.

