Franske ITC-2480 Lab 6: Difference between revisions
BenFranske (talk | contribs) No edit summary |
BenFranske (talk | contribs) |
||
| (5 intermediate revisions by the same user not shown) | |||
| Line 1: | Line 1: | ||
=Introduction= | =Introduction= | ||
In this lab you will | In this lab you will perform the following tasks: | ||
*Installing typical website software on your server including a forum and blog software | |||
*Playing with basic PHP web scripting | |||
In all of these cases you should download the latest stable .tar.gz version of the software from the website and install it following the official documentation. <br> | |||
'''DO NOT''' install pre-built Debian packages, this is not allowed and will not prepare you properly for installing this type of software in many web hosting environments. | |||
There are no specific Linux commands needed for this lab, but this lab assumes you can do the following: | |||
*[[Lab_5_mnjk#Experiment_with_Databases | MariaDB database creation]] | |||
*[[Lab_5_mnjk#Experiment_with_Website_PHP | Creating HTML links]] | |||
=Lab Procedure= | =Lab Procedure= | ||
== Prerequisites == | == Prerequisites == | ||
# Open an SSH console to your Linux system using the PuTTY software | # Open an SSH console to your Linux system using the PuTTY software | ||
# Login with your standard user account | |||
# Use FileZilla to transfer files to your system using SCP/SFTP if needed | # Use FileZilla to transfer files to your system using SCP/SFTP if needed | ||
== Install Wordpress == | == Install Wordpress == | ||
'''''[https://www.youtube.com/watch?v=Qg5fow1_SCY&feature=youtu.be Video Tutorial - Install Wordpress]''''' | |||
# Download the latest stable version of the [http://wordpress.org/ Wordpress blogging software] | # Download the latest stable version of the [http://wordpress.org/ Wordpress blogging software] | ||
# Try following the [http://codex.wordpress.org/Main_Page official installation documentation] to install the software. Your goal is to install the software in the /blog/ directory of your webserver so that you can visit your blog by going to http://example.com/blog/ where example.com is your IP address (we don't have DNS setup) | #:[[file:Lab6_links_wordpress.png | link= https://wiki.ihitc.net/mediawiki/images/3/39/Lab6_links_wordpress.png | 500px]] | ||
# | #:[[media:Lab6_links_wordpress.png| Click for Larger Image]] | ||
# Once the software is installed make sure that you can successfully log in to the Wordpress web interface and add a few blog posts | # Try following the [http://codex.wordpress.org/Main_Page official installation documentation] to install the software. | ||
#: Your goal is to install the software in the ''/blog/'' directory of your webserver so that you can visit your blog by going to http://''example.com''/blog/ where ''example.com'' is your IP address (we don't have DNS setup). | |||
#: ''HINT: You can use either the mysql command line client or the Webmin interface to do the database setup.'' | |||
#* The command to create a database in MariaDB is: | |||
#: <code> CREATE DATABASE <name of database>; </code> | |||
#* Once the database is created you will need to create a user: | |||
#: <code> CREATE USER '<username>'@'localhost' IDENTIFIED BY '<password>';</code> | |||
#* Now grant the newly created user privileges: | |||
#: <code> GRANT ALL PRIVILEGES ON <database> . * TO '<username>'@'localhost';</code> | |||
#* Once you've completed these steps return to the Wordpress Installation Guide and complete the installation. | |||
#:[[file:Lab6_WordPress_Installation_mk2.png | link= https://wiki.ihitc.net/mediawiki/images/f/fa/Lab6_WordPress_Installation_mk2.png | 500px]] | |||
#:[[media:Lab6_WordPress_Installation_mk2.png | Click for Larger Image]] | |||
# Once the software is installed make sure that you can successfully log in to the Wordpress web interface and add a few blog posts. | |||
#:[[file:Lab6_wordpress_default_blog_mk2.png | link= https://wiki.ihitc.net/mediawiki/images/9/9b/Lab6_wordpress_default_blog_mk2.png | 500px]] | |||
#:[[media:Lab6_wordpress_default_blog_mk2.png| Click for Larger Image]] | |||
== Install MyBB == | == Install MyBB == | ||
# Download and install the latest stable version of the [http://www.mybb.com/ MyBB forum software] following the instructions in their documentation. Your goal is to install the software in the /forum/ directory of your webserver so that you can visit your forum by going to http://example.com/forum/ where example.com is your IP address (we don't have DNS setup) | '''''[https://www.youtube.com/watch?v=VegevSlCpSQ&feature=youtu.be Video Tutorial - Install MyBB]''''' | ||
# Download and install the latest stable version of the [http://www.mybb.com/ MyBB forum software] following the instructions in their documentation. | |||
#:[[file:lab6_links_mybb.png | link= https://wiki.ihitc.net/mediawiki/images/2/2b/Lab6_links_mybb.png | 500px]] | |||
#:[[media:lab6_links_mybb.png | Click for Larger Image]] | |||
#: Your goal is to install the software in the ''/forum/'' directory of your webserver so that you can visit your forum by going to http://''example.com''/forum/ where ''example.com'' is your IP address (we don't have DNS setup) | |||
#:[[file:lab6_MyBB_Installation.png | link= https://wiki.ihitc.net/mediawiki/images/d/d2/Lab6_MyBB_Installation.png | 500px]] | |||
#:[[media:lab6_MyBB_Installation.png | Click for Larger Image]] | |||
#: ''HINT: If you get an error during installation about PHP XML extensions, use '''apt''' to search for and install php-xml. After that use '''sudo service apache2 restart''' to restart Apache2 and apply the change. | |||
# Make sure that you can create forums, users, and posts once you have installed the software. | # Make sure that you can create forums, users, and posts once you have installed the software. | ||
#:[[file:lab6_mybb_default.png | link= https://wiki.ihitc.net/mediawiki/images/d/d6/Lab6_mybb_default.png | 500px]] | |||
#:[[media:lab6_mybb_default.png | Click for Larger Image]] | |||
== Install One Additional PHP Application == | == Install One Additional PHP Application == | ||
'''''[https://www.youtube.com/watch?v=X-u9EdQxcxw&feature=youtu.be Video Tutorial - Additional PHP Applications]''''' | |||
# Select One Additional PHP Application from the list below and install it following the official documentation: | # Select One Additional PHP Application from the list below and install it following the official documentation: | ||
#* [http://www.opencart.com/ OpenCart] - Web Store System | #* [http://www.opencart.com/ OpenCart] - Web Store System | ||
#* [https://www.mediawiki.org/ MediaWiki] - Wiki System | #* [https://www.mediawiki.org/ MediaWiki] - Wiki System | ||
#* [ | #* [https://www.joomla.org/ Joomla!] - Content Management System | ||
#* [ | #* [https://nextcloud.com NextCloud] - File Management like Google Drive | ||
#* [http://piwigo.org/ Piwigo] - Image Gallery | #* [http://piwigo.org/ Piwigo] - Image Gallery | ||
#* [ | #* [https://gnu.io/social/ GNU Social] - Microblogging like Twitter | ||
#* [https://www.limesurvey.org/stable-release LimeSurvey] - Run your own site like SurveyMonkey | |||
#* Other PHP applications may be approved by your instructor | #* Other PHP applications may be approved by your instructor | ||
# After completing the installation make sure the software works as it should | # After completing the installation make sure the software works as it should | ||
== Experiment With PHP == | == Experiment With PHP == | ||
# Take a look at the simple [ | # Take a look at the simple [https://web.archive.org/web/20210323184526/https://www.w3schools.com/php/php_ajax_rss_reader.asp RSS reader on the w3schools site] | ||
# See if you can get the RSS reader working on your own server | # See if you can get the RSS reader working on your own server. | ||
# Try changing one or both of the RSS feeds from Google and | #:[[file:lab6_rss.png | link= https://wiki.ihitc.net/mediawiki/images/a/a0/Lab6_rss.png | 500px]] | ||
#:[[media:lab6_rss.png | Click for Larger Image]] | |||
# Try changing one or both of the RSS feeds from Google and ZDNet to feed(s) of your choice | |||
# Try modifying the code to include more than two RSS feeds | # Try modifying the code to include more than two RSS feeds | ||
#: ''Hint: The idea in this section of the lab is to see if you can figure out how a simple PHP application works and modify it, not specifically to see if you can run the RSS reader.'' | |||
== Update Your Main Page == | == Update Your Main Page == | ||
# Put links on your main INDEX page to everything you have done (your blog, forums, additional PHP software, and RSS reader experimental page) | # Put links on your main INDEX page to everything you have done (your blog, forums, additional PHP software, and RSS reader experimental page) | ||
#: Here is a sample of what your INDEX page might look like, but you are free to customize it however you wish: | |||
#: [[File:Lab6_index_page.png|link=https://wiki.ihitc.net/mediawiki/images/0/00/Lab6_index_page.png | 500px]] | |||
#: [[Media:Lab6_index_page.png| Click here for larger image]] | |||
=Checking your Work= | |||
Wordpress | |||
# On your host computer navigate to http://''example.com''/blog. | |||
# Make a blog post. | |||
# Reach out to someone else in the class (you can get classmates email addresses from the D2L Classlist) and ask them to comment on your blog post. | |||
#: If you are able to post and see a comment from your classmate you have successfully completed the Wordpress section of the lab. | |||
<br> | |||
MyBB | |||
# On your host computer navigate to http://''example.com''/forum. | |||
# Create a forum. | |||
# Create a user account. | |||
# Make a post using your new user account. | |||
#: If you are able to make a post using the new user account you have successfully completed the MyBB section of the lab. | |||
<br> | |||
Other PHP Applications<br> | |||
: Depending on which PHP application you installed the method of testing will be different | |||
:Use your creativity. Here are some ideas: | |||
*Upload something. | |||
* Post Something. | |||
*Make a new page. | |||
: When you are satisfied that your application is working properly, you have completed the PHP application section of this lab. | |||
<br> | |||
RSS Feed Reader | |||
# From your host system navigate to the location of your RSS feed. | |||
#: ''HINT: This should be linked on your index page'' | |||
# Use the dropdown bar to select a feed. | |||
#: The most recent posts from that feed should appear. | |||
#:[[file:Lab6_rss_sample.png | link= https://wiki.ihitc.net/mediawiki/images/f/f7/Lab6_rss_sample.png | 500px]] | |||
#:[[media:Lab6_rss_sample.png | Click for Larger Image]] | |||
# Try clicking the link to navigate to the full article. | |||
#: If you are able to complete all these steps you have successfully completed the RSS Reader section of this lab. | |||
<br><br> | |||
<li> Automatically check your results by running this command:</li> | |||
<code><nowiki> | |||
curl https://raw.githubusercontent.com/mnjk-inver/Linux-2480-Rebuild/main/lab_06_test.py | python3 | |||
</nowiki></code> | |||
</ol> | |||
<br><br> | |||
=Web App= | |||
You can check your progress on any of the labs in the ITC-2480 course from a webapp from this link: <br> | |||
[http://webcheck.itc2480.campus.ihitc.net webcheck.itc2480.campus.ihitc.net]<br> | |||
You must be logged into the campus VPN to use this application. | |||
Latest revision as of 21:06, 3 December 2021
Introduction
In this lab you will perform the following tasks:
- Installing typical website software on your server including a forum and blog software
- Playing with basic PHP web scripting
In all of these cases you should download the latest stable .tar.gz version of the software from the website and install it following the official documentation.
DO NOT install pre-built Debian packages, this is not allowed and will not prepare you properly for installing this type of software in many web hosting environments.
There are no specific Linux commands needed for this lab, but this lab assumes you can do the following:
Lab Procedure
Prerequisites
- Open an SSH console to your Linux system using the PuTTY software
- Login with your standard user account
- Use FileZilla to transfer files to your system using SCP/SFTP if needed
Install Wordpress
Video Tutorial - Install Wordpress
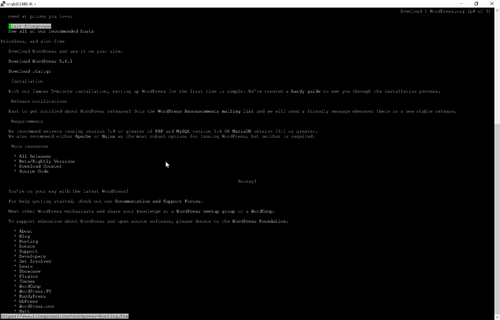
- Download the latest stable version of the Wordpress blogging software
- Try following the official installation documentation to install the software.
- Your goal is to install the software in the /blog/ directory of your webserver so that you can visit your blog by going to http://example.com/blog/ where example.com is your IP address (we don't have DNS setup).
- HINT: You can use either the mysql command line client or the Webmin interface to do the database setup.
- The command to create a database in MariaDB is:
CREATE DATABASE <name of database>;
- Once the database is created you will need to create a user:
CREATE USER '<username>'@'localhost' IDENTIFIED BY '<password>';
- Now grant the newly created user privileges:
GRANT ALL PRIVILEGES ON <database> . * TO '<username>'@'localhost';
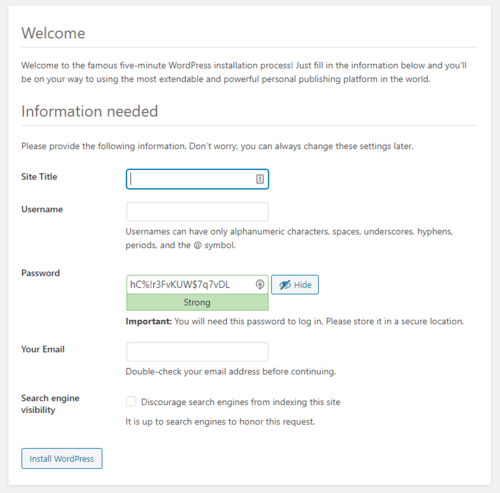
- Once you've completed these steps return to the Wordpress Installation Guide and complete the installation.
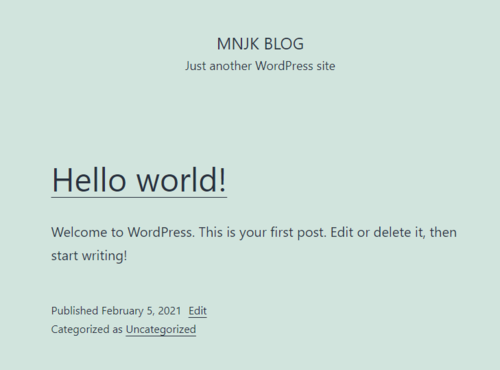
- Once the software is installed make sure that you can successfully log in to the Wordpress web interface and add a few blog posts.
Install MyBB
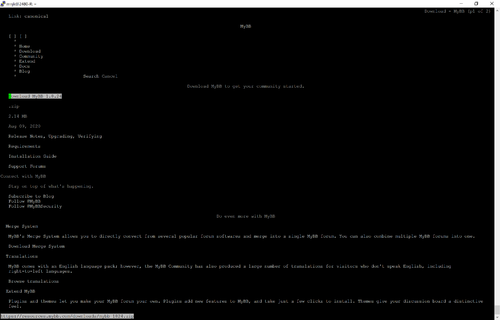
- Download and install the latest stable version of the MyBB forum software following the instructions in their documentation.
- Click for Larger Image
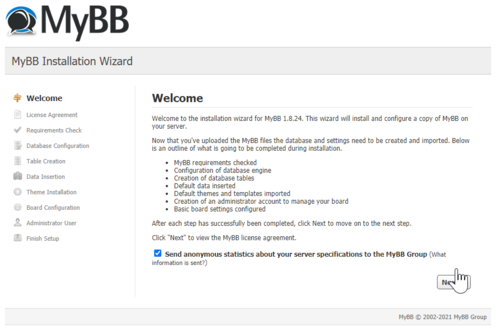
- Your goal is to install the software in the /forum/ directory of your webserver so that you can visit your forum by going to http://example.com/forum/ where example.com is your IP address (we don't have DNS setup)
- Click for Larger Image
- HINT: If you get an error during installation about PHP XML extensions, use apt to search for and install php-xml. After that use sudo service apache2 restart to restart Apache2 and apply the change.
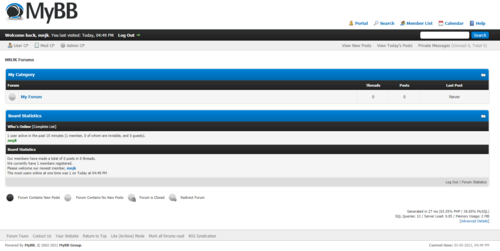
- Make sure that you can create forums, users, and posts once you have installed the software.
Install One Additional PHP Application
Video Tutorial - Additional PHP Applications
- Select One Additional PHP Application from the list below and install it following the official documentation:
- OpenCart - Web Store System
- MediaWiki - Wiki System
- Joomla! - Content Management System
- NextCloud - File Management like Google Drive
- Piwigo - Image Gallery
- GNU Social - Microblogging like Twitter
- LimeSurvey - Run your own site like SurveyMonkey
- Other PHP applications may be approved by your instructor
- After completing the installation make sure the software works as it should
Experiment With PHP
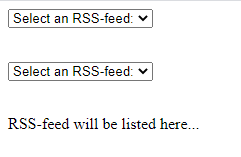
- Take a look at the simple RSS reader on the w3schools site
- See if you can get the RSS reader working on your own server.
- Try changing one or both of the RSS feeds from Google and ZDNet to feed(s) of your choice
- Try modifying the code to include more than two RSS feeds
- Hint: The idea in this section of the lab is to see if you can figure out how a simple PHP application works and modify it, not specifically to see if you can run the RSS reader.
Update Your Main Page
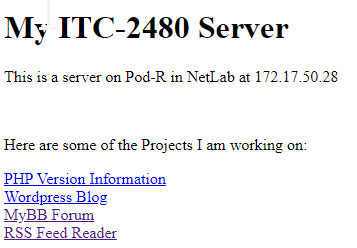
- Put links on your main INDEX page to everything you have done (your blog, forums, additional PHP software, and RSS reader experimental page)
- Here is a sample of what your INDEX page might look like, but you are free to customize it however you wish:
- Click here for larger image
Checking your Work
Wordpress
- On your host computer navigate to http://example.com/blog.
- Make a blog post.
- Reach out to someone else in the class (you can get classmates email addresses from the D2L Classlist) and ask them to comment on your blog post.
- If you are able to post and see a comment from your classmate you have successfully completed the Wordpress section of the lab.
MyBB
- On your host computer navigate to http://example.com/forum.
- Create a forum.
- Create a user account.
- Make a post using your new user account.
- If you are able to make a post using the new user account you have successfully completed the MyBB section of the lab.
Other PHP Applications
- Depending on which PHP application you installed the method of testing will be different
- Use your creativity. Here are some ideas:
- Upload something.
- Post Something.
- Make a new page.
- When you are satisfied that your application is working properly, you have completed the PHP application section of this lab.
RSS Feed Reader
- From your host system navigate to the location of your RSS feed.
- HINT: This should be linked on your index page
- Use the dropdown bar to select a feed.
- The most recent posts from that feed should appear.

- Click for Larger Image
- Try clicking the link to navigate to the full article.
- If you are able to complete all these steps you have successfully completed the RSS Reader section of this lab.
curl https://raw.githubusercontent.com/mnjk-inver/Linux-2480-Rebuild/main/lab_06_test.py | python3
Web App
You can check your progress on any of the labs in the ITC-2480 course from a webapp from this link:
webcheck.itc2480.campus.ihitc.net
You must be logged into the campus VPN to use this application.
